Mar 5, 2025
Building a Live Search Functionality in Webflow with Jetboost
Enhancing user experience on your Webflow site can be as simple as integrating a live search feature. This allows users to see results in real-time as they type, making navigation smoother and more efficient. In this guide, we'll dive into how to implement this functionality using Jetboost, a powerful third-party plugin that offers a lot more than just basic search capabilities.
What is Jetboost?
Jetboost is a versatile tool designed to supercharge your Webflow CMS. It offers real-time search, dynamic filtering, and other functionalities that can enhance your site's interactivity. Unlike Webflow’s built-in search, which lacks real-time updates, Jetboost allows users to see results instantly without refreshing the page. This makes it an ideal choice for anyone looking to improve their website's search experience.
Integrating Jetboost with Your Webflow Project
To get started, you first need to integrate Jetboost with your Webflow project. Here’s how to do it step by step:
Step 1: Create Your Jetboost Account
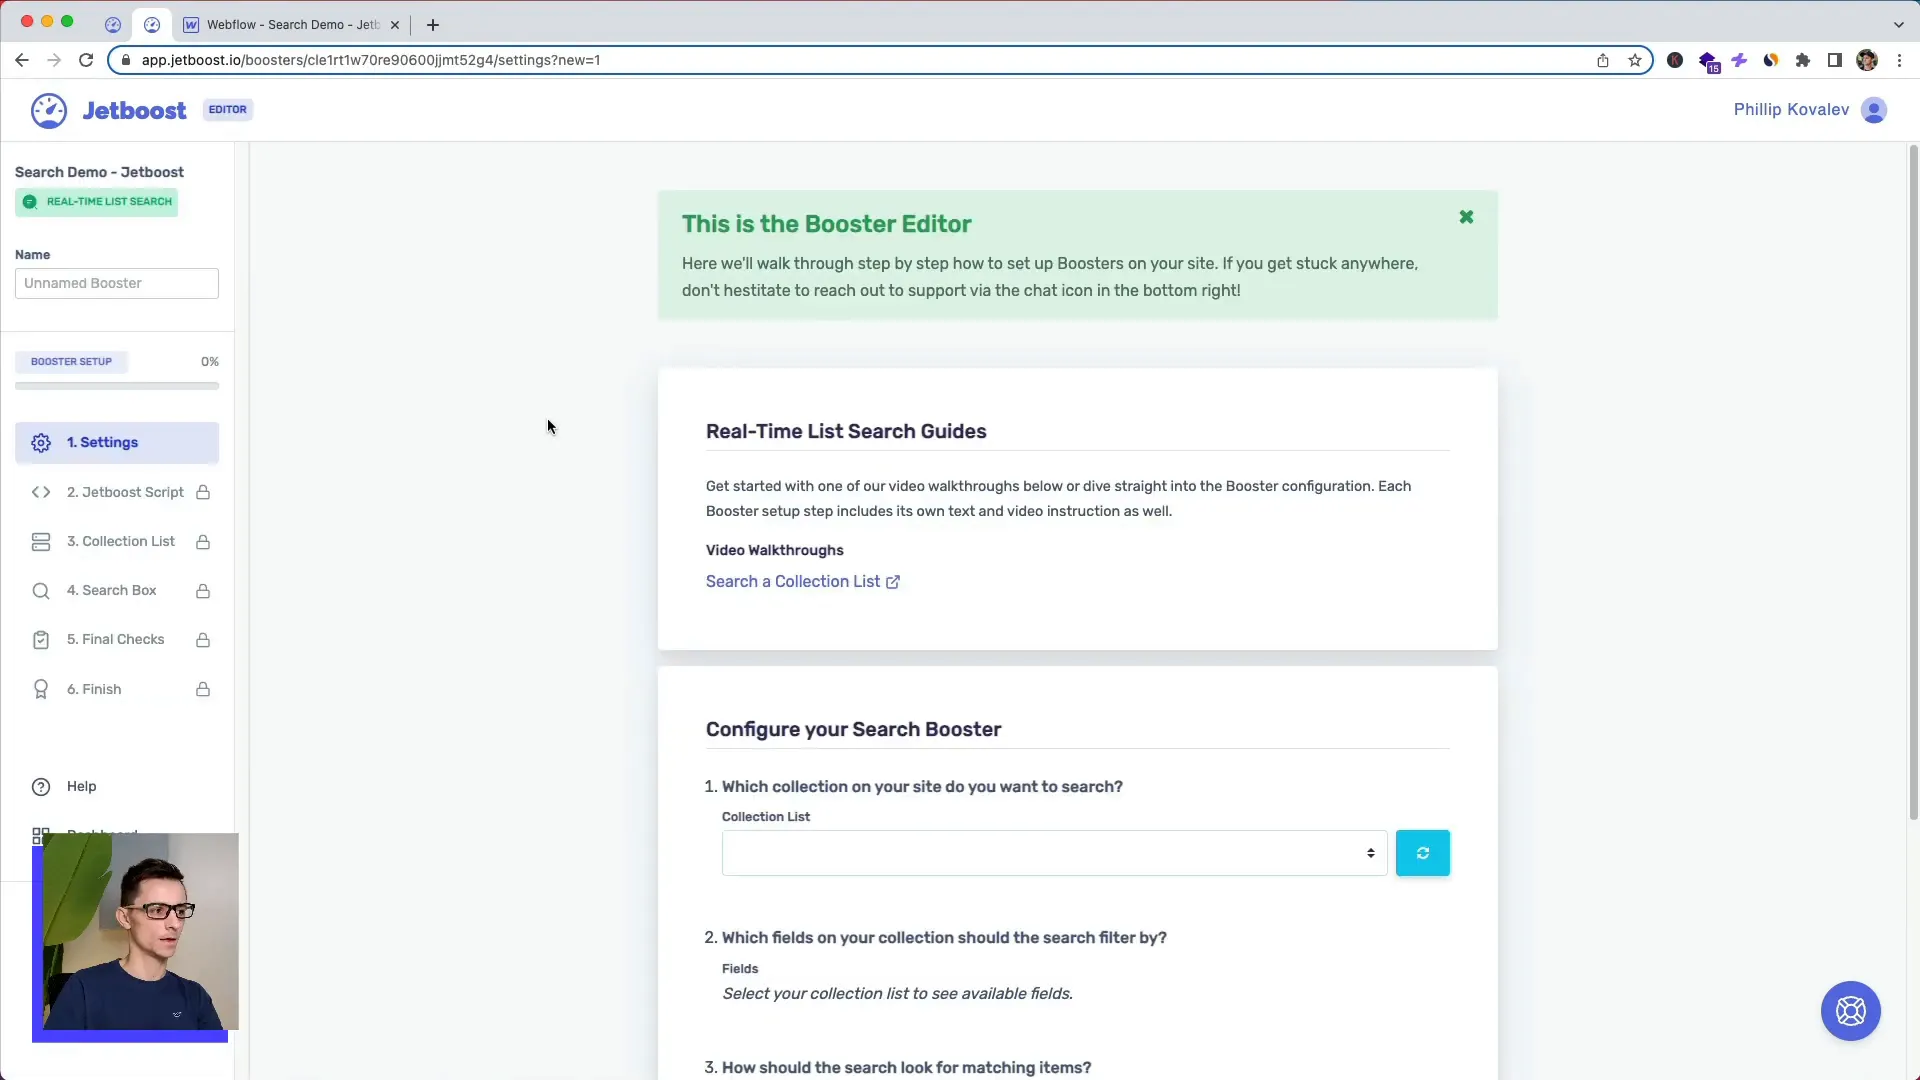
Begin by signing up for Jetboost. Once you’ve logged in, select the project you want to work on. In this case, we’ll be using a demo project named “Search Demo.” After selecting your project, you'll see a message confirming that the integration was successful.
Step 2: Select Your CMS Collection
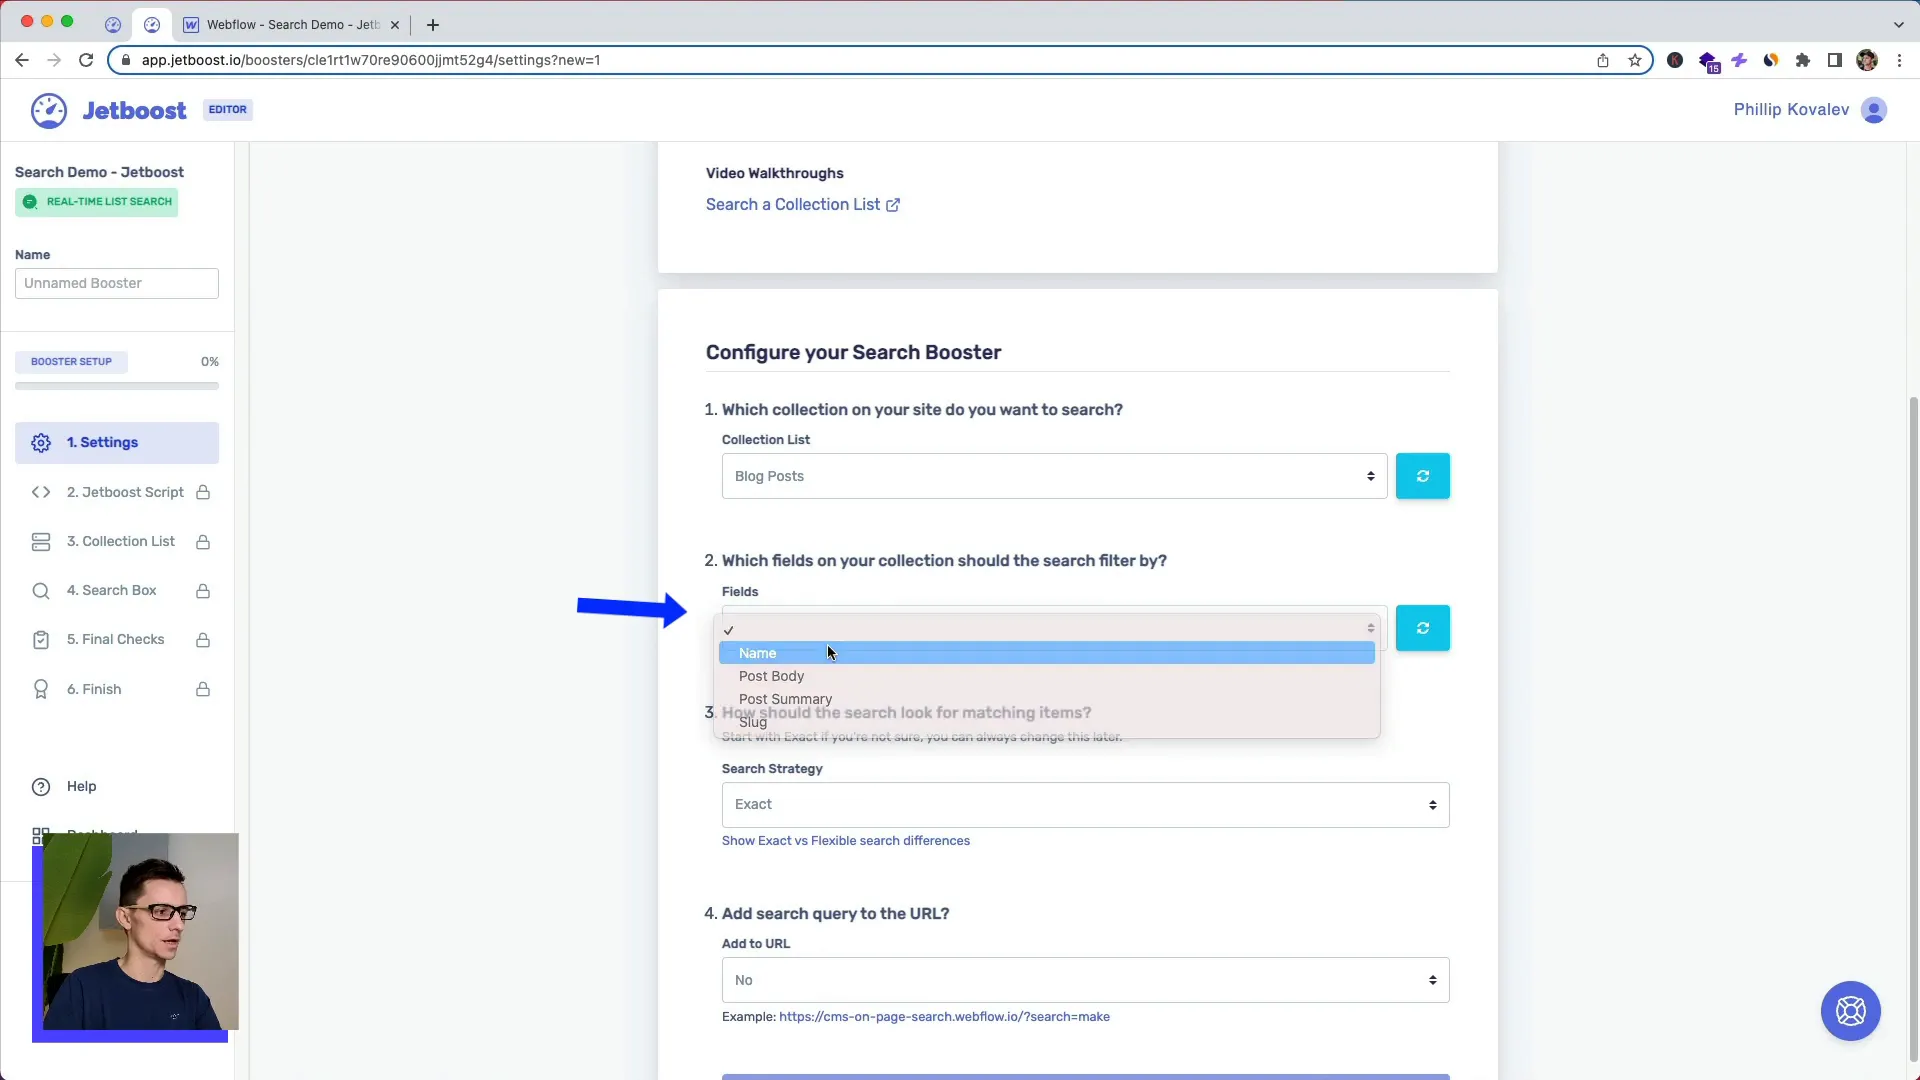
Next, you need to choose which collection on your site you want to search. For this example, we’ll select the "Blog Post" collection. You can also specify which fields within that collection should be searchable. For instance, you might want to filter by the post name, summary, or body content. For simplicity, we’ll just filter by the name for now.
Step 3: Configure Search Matching
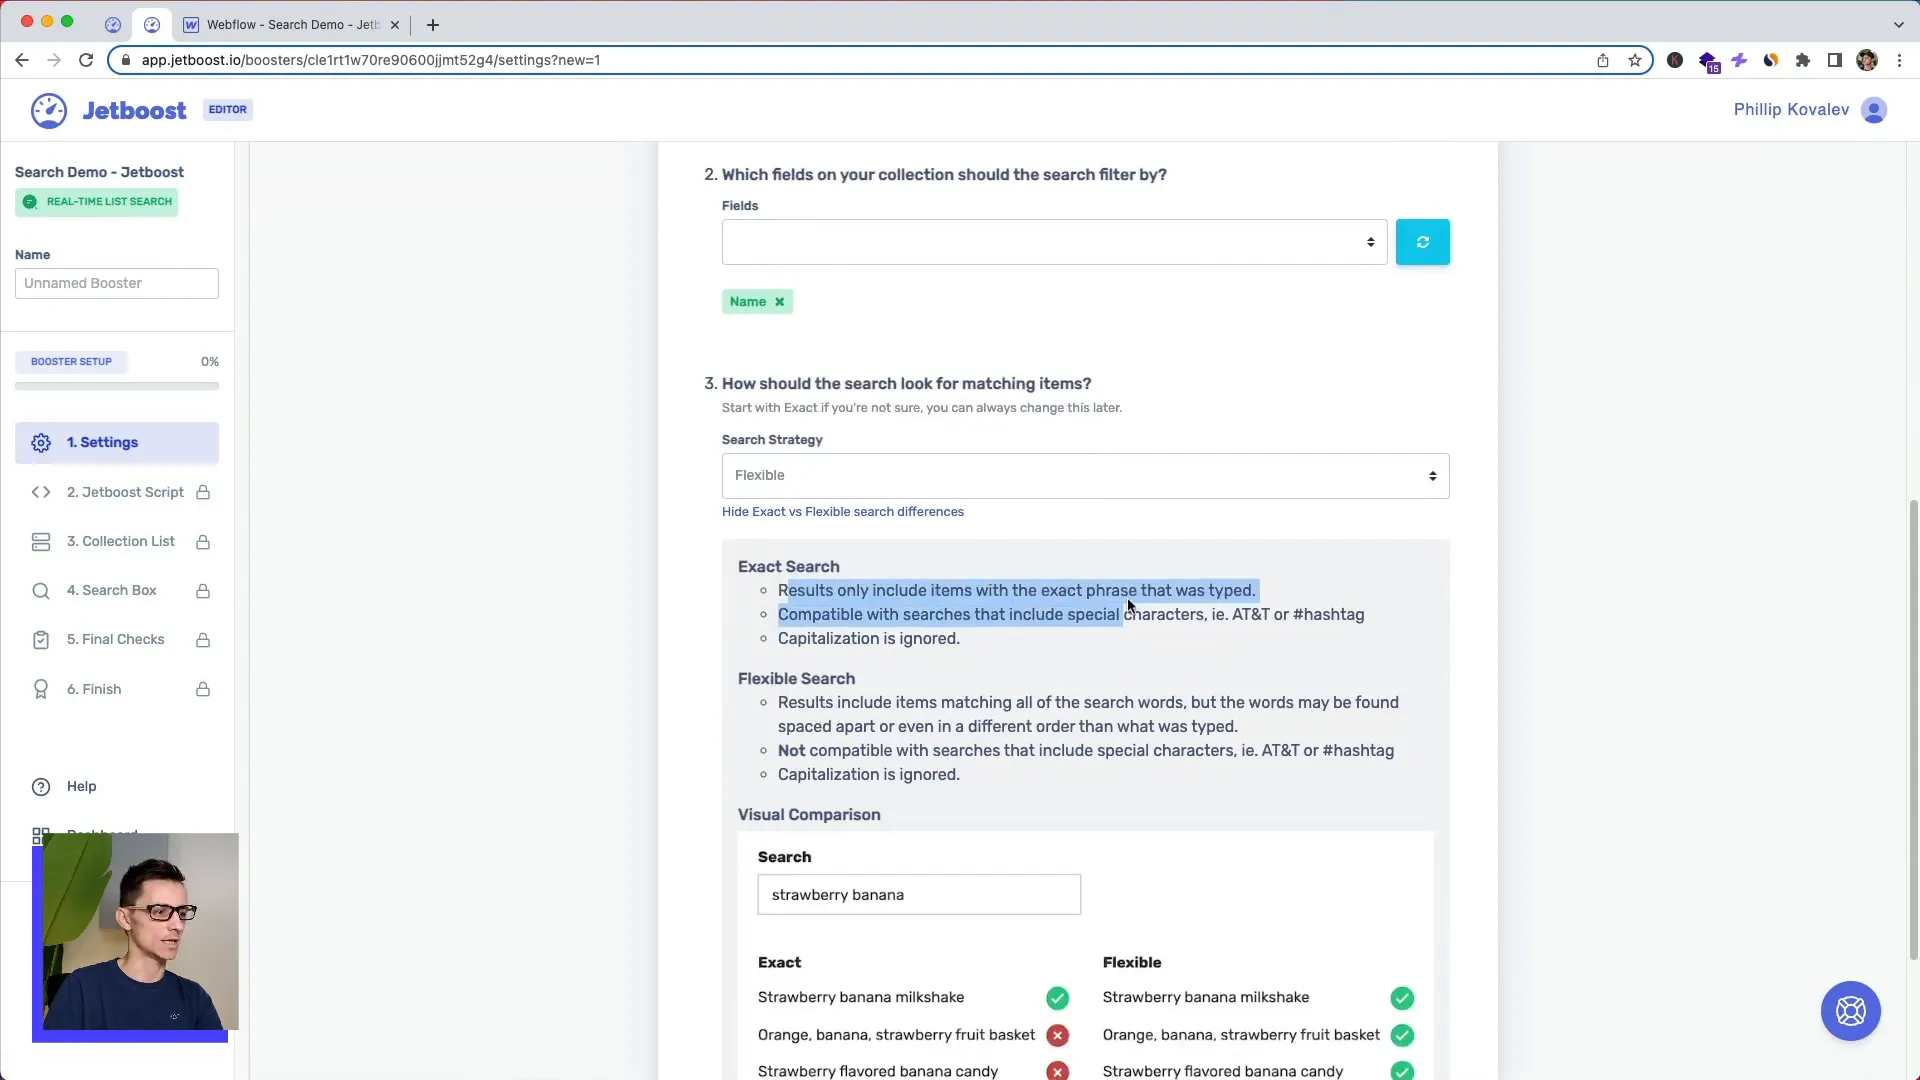
Jetboost allows you to set how the search will match items in your collection. You can choose between an exact match or a flexible match. The flexible option is particularly useful as it accommodates variations in user input. For example, typing “10 design tools” can yield results for both “10 design tools” and “10 web design tools.”
Step 4: Add Custom Code
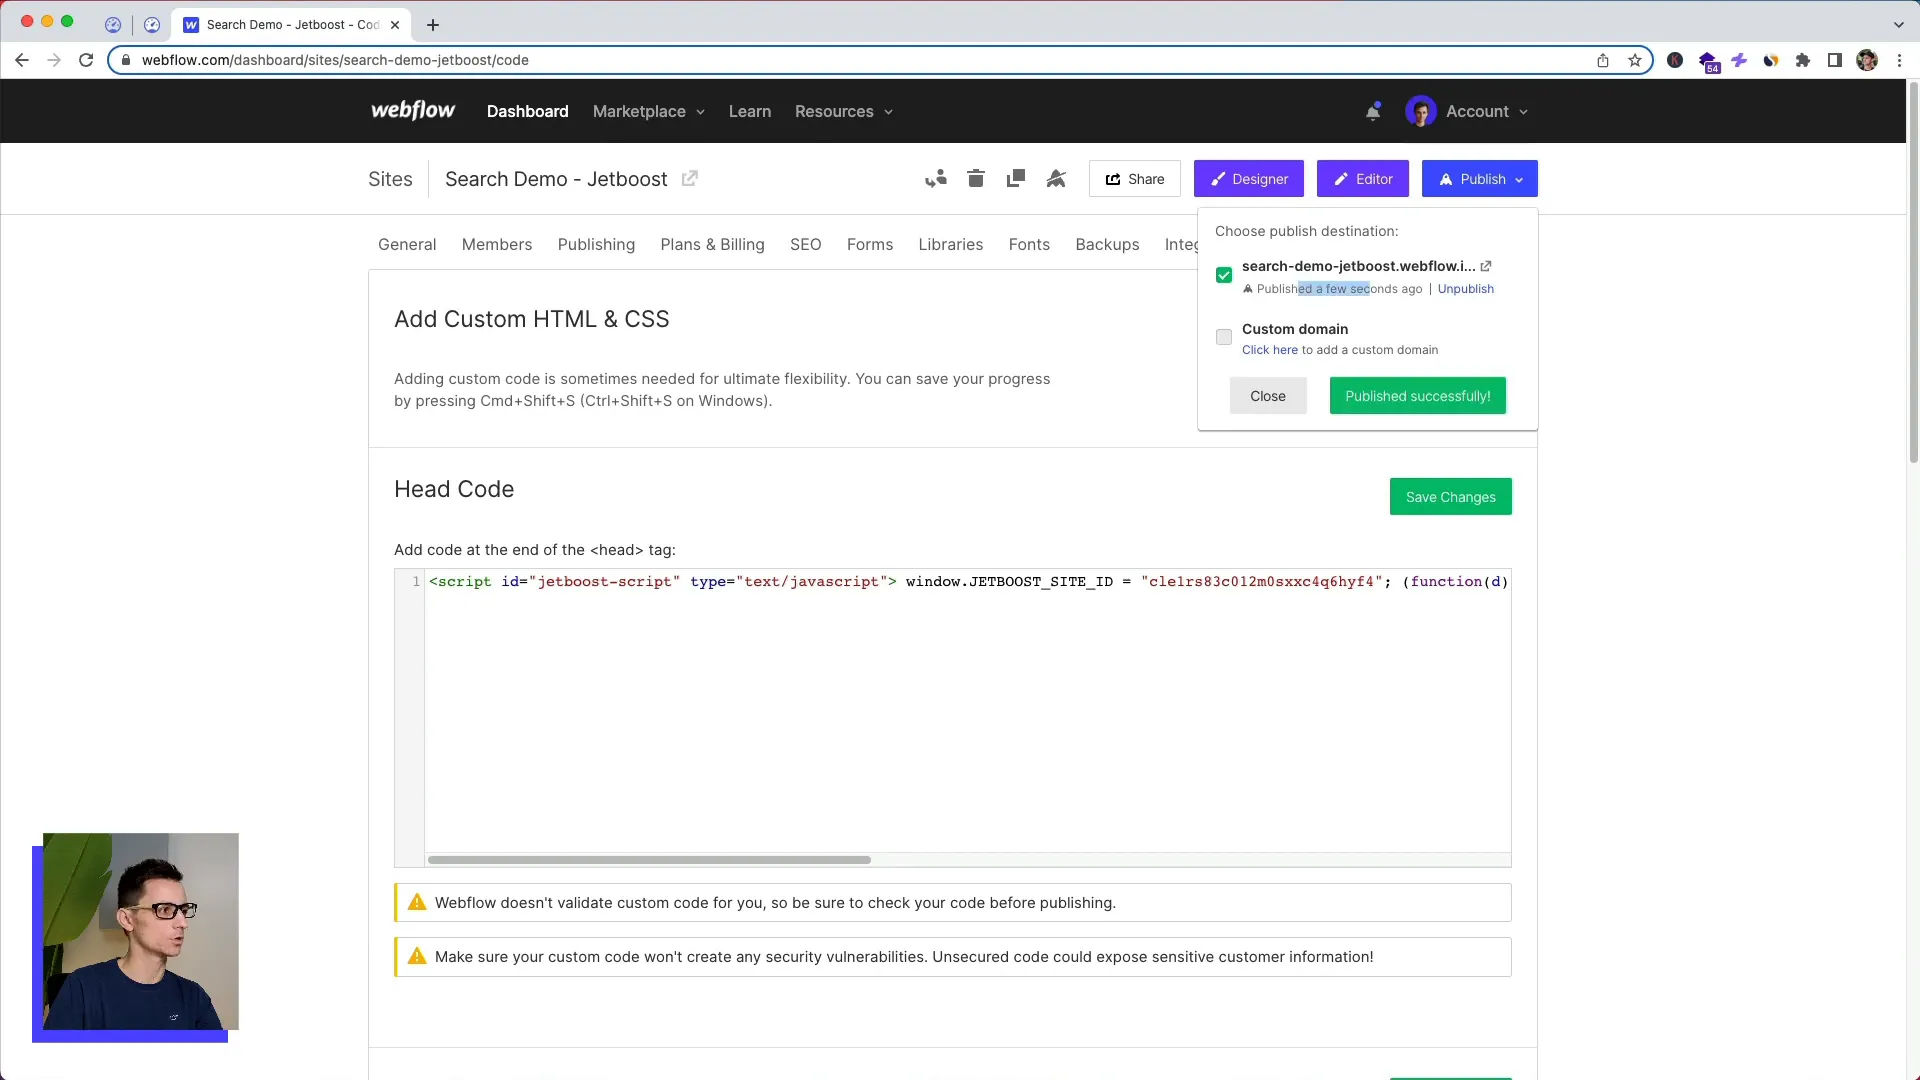
Now, navigate to your Webflow site’s custom code settings. You’ll need to paste a snippet of code provided by Jetboost here. This step is crucial for enabling the search functionality. After pasting the code, click save, and then publish your site to implement the changes.
Step 5: Add a Custom Class
Next, go to your designer view in Webflow. Select the collection list's top parent element and paste the class provided by Jetboost. This class is essential for the search functionality to work correctly.
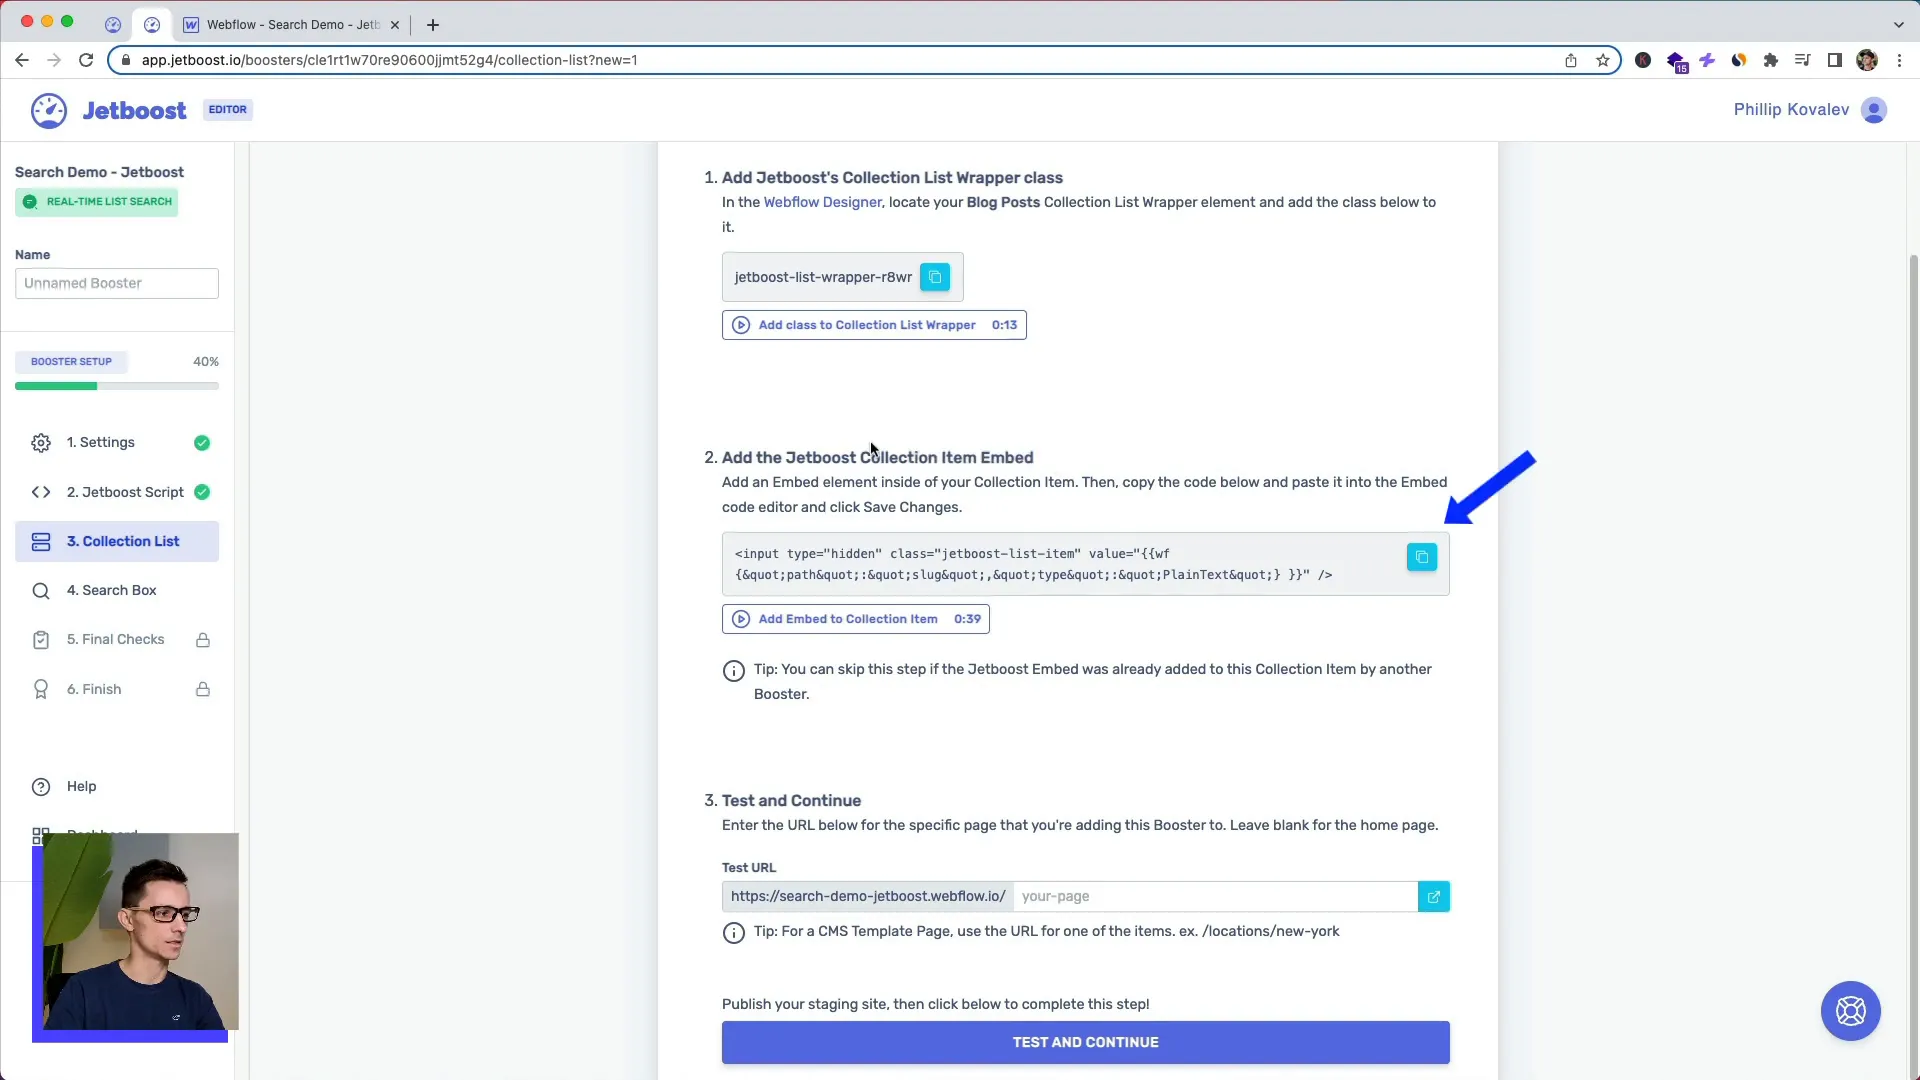
Step 6: Embed the Search Code
Now, you need to add an embed block inside your collection list. This is done by clicking the plus symbol and selecting the embed option. Paste the snippet of code you copied from Jetboost into this block and save it. Make sure to move this embed block to the top of the collection item so it’s the first thing users see.
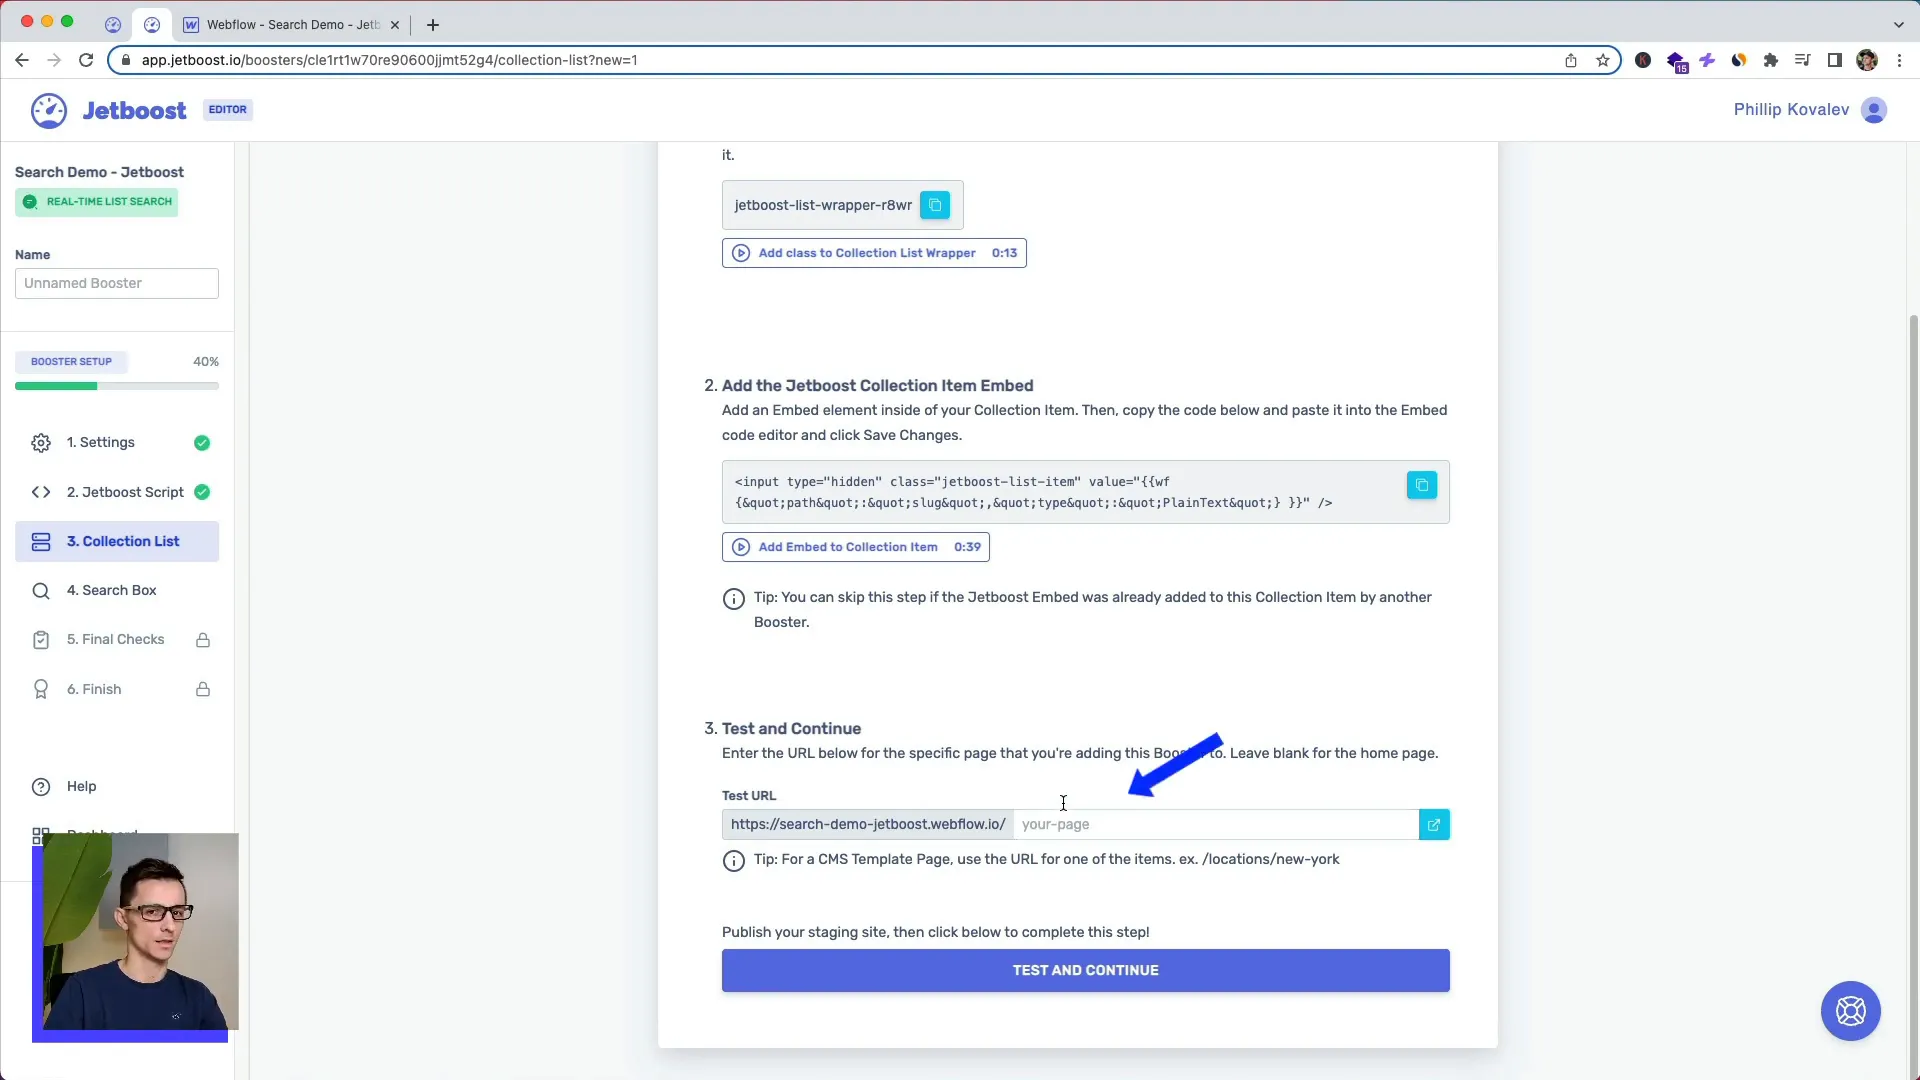
Testing the Live Search Functionality
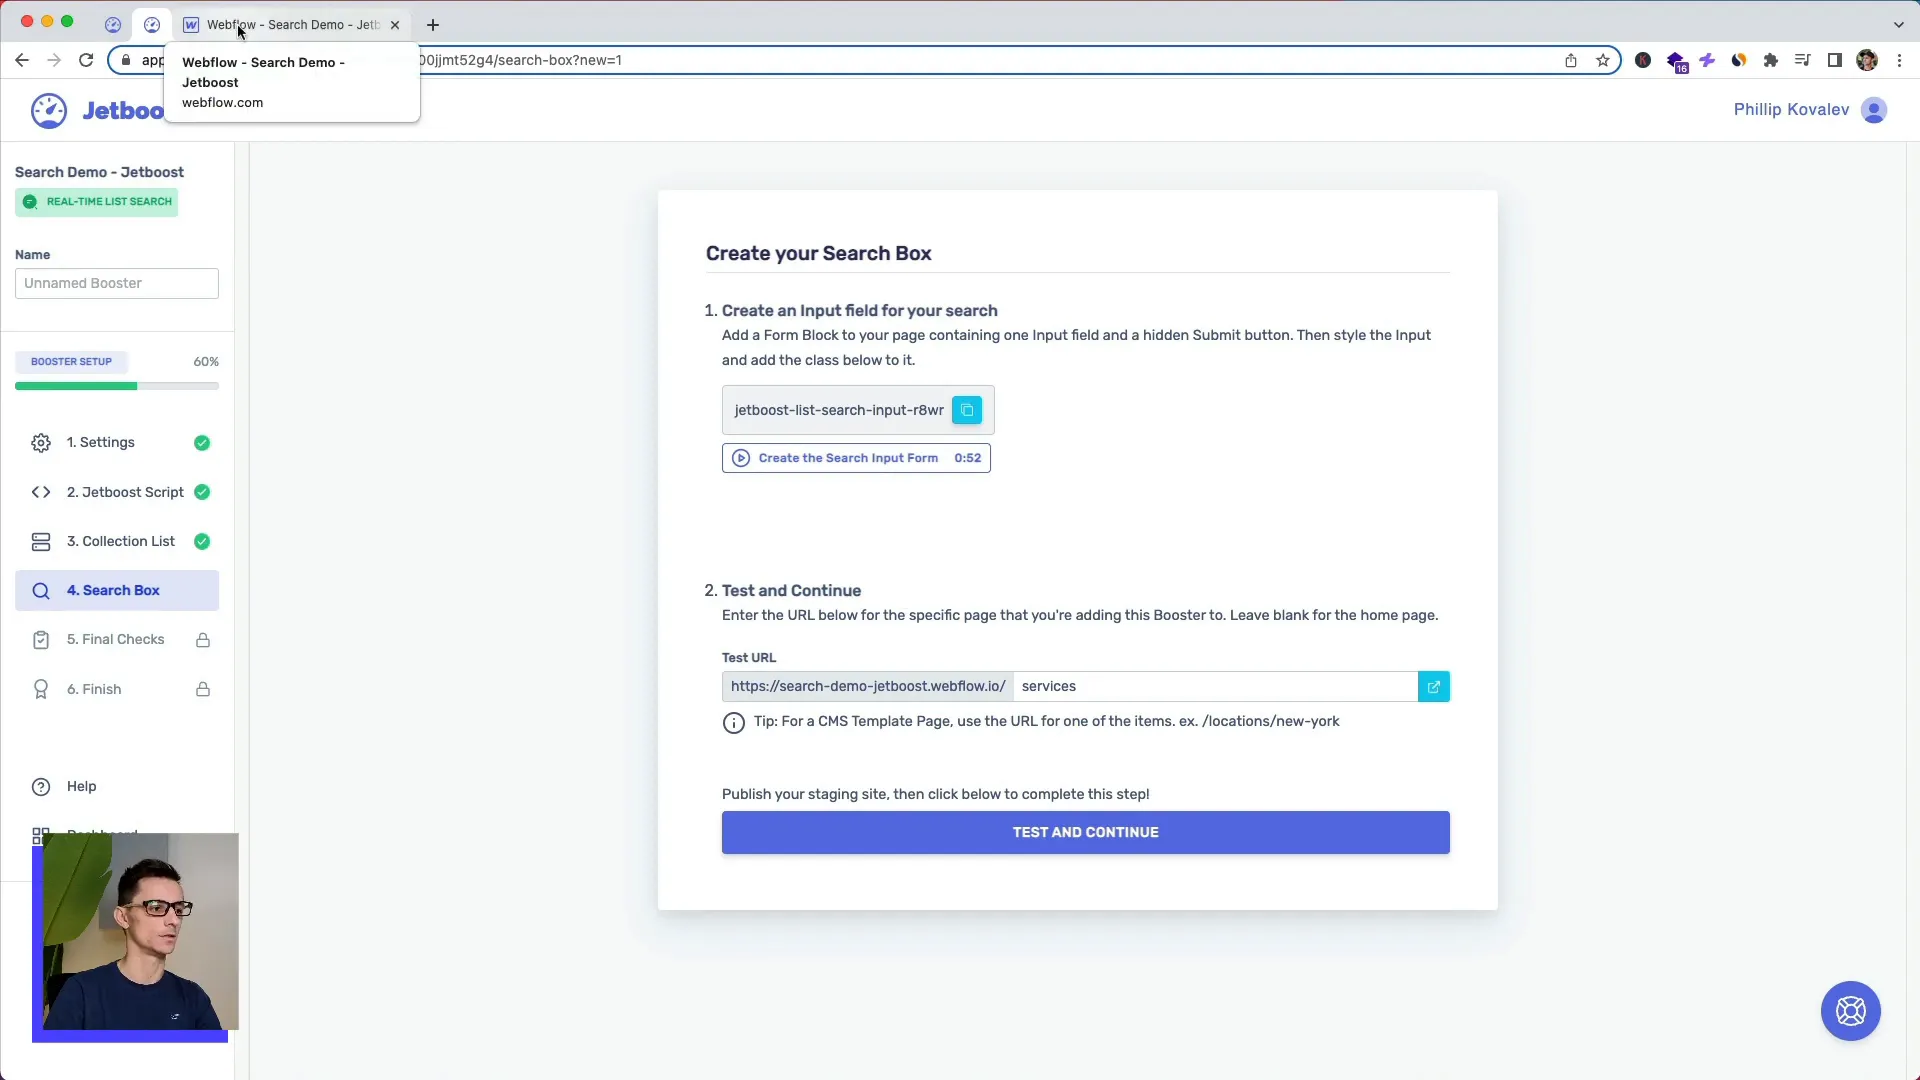
Once you’ve completed the integration steps, it’s time to test the functionality. You'll need to enter the exact URL of the page where you want the live search to operate. Before testing, ensure that your site is published. Click on the “Test and Continue” button in Jetboost, and you should see a green check mark indicating everything is set up correctly.
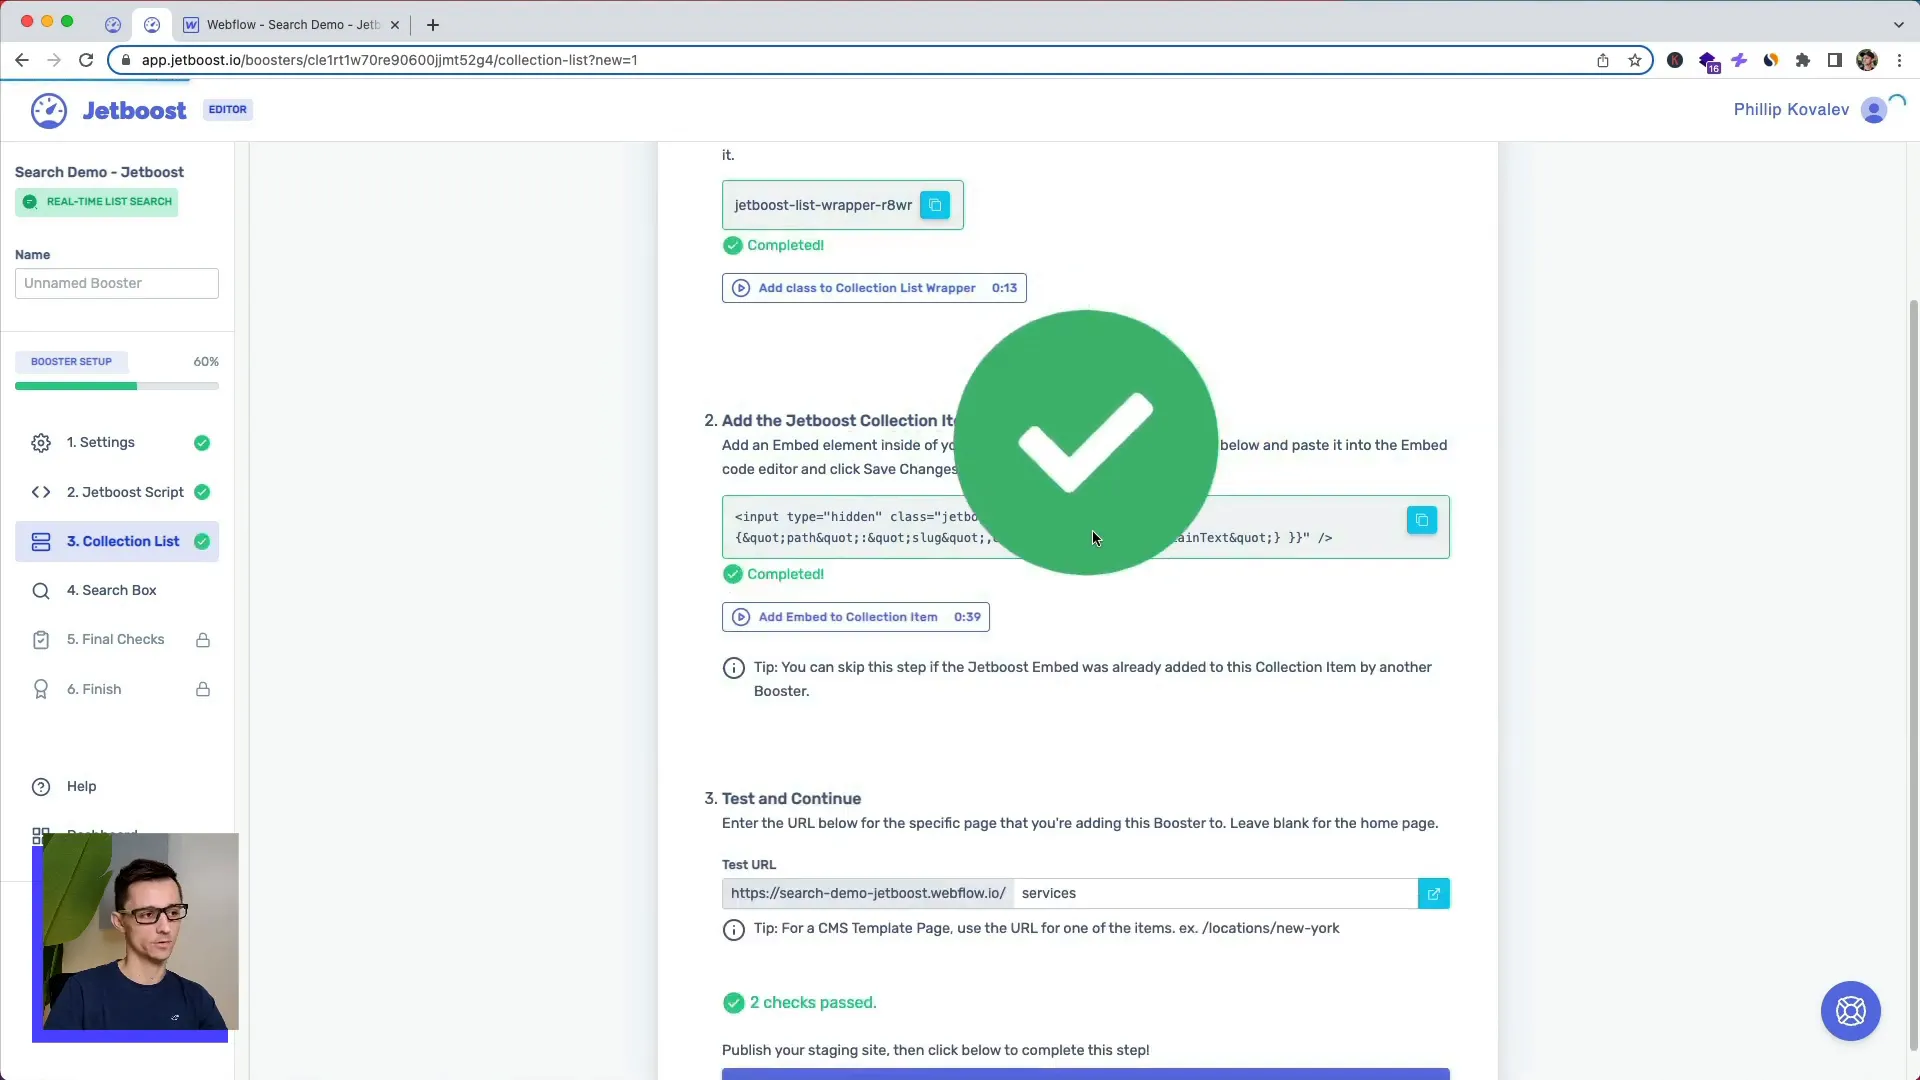
Setting Up the Search Box
Now, let's focus on the search box itself. Ensure that your search box uses the Webflow form block. You can add this by scrolling down to the form section and selecting the form block. By default, the form block comes with multiple fields, but you can delete all except the search bar and a label if you wish.
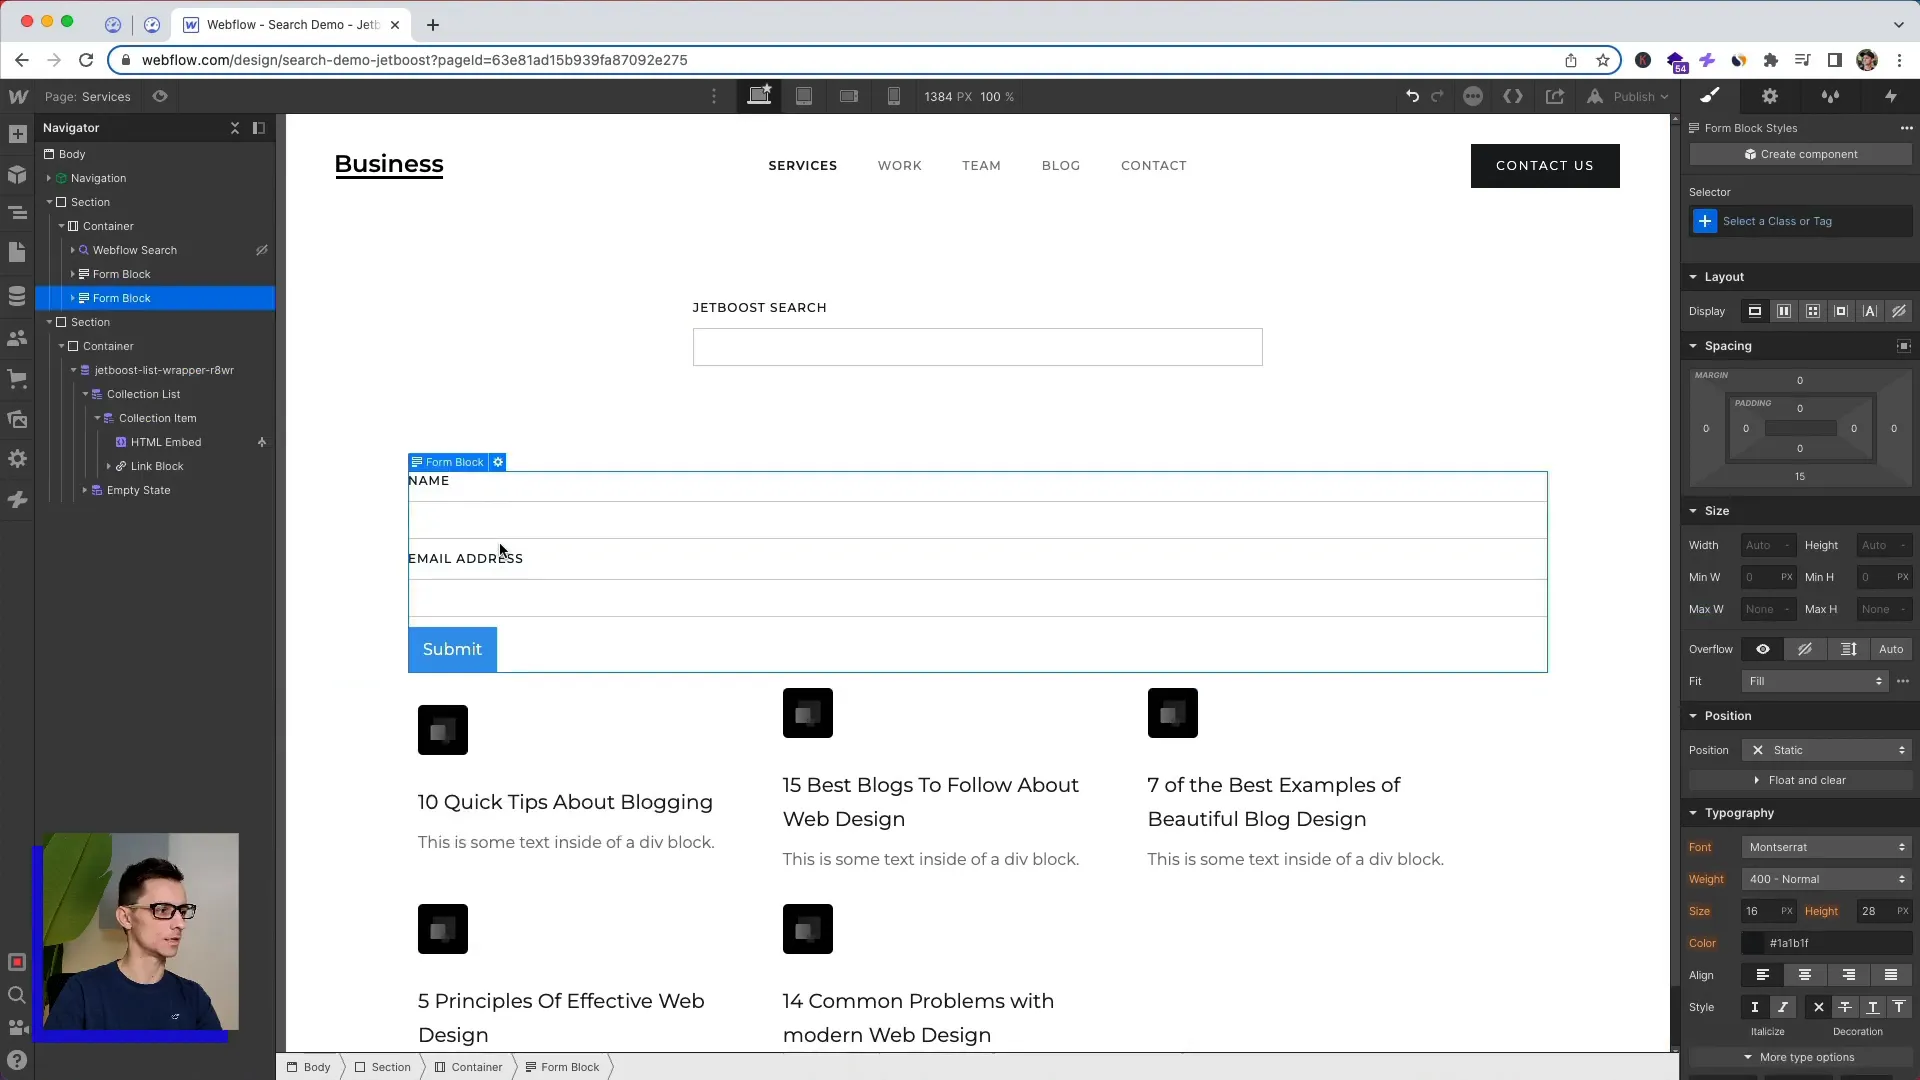
Customizing the Search Box
Once you have the search box set up, click on it and go back to Jetboost to copy the custom code for the search input. Paste this code into the text field of your search box. This will allow Jetboost to recognize the input and filter the data accordingly.
Final Checks and Testing
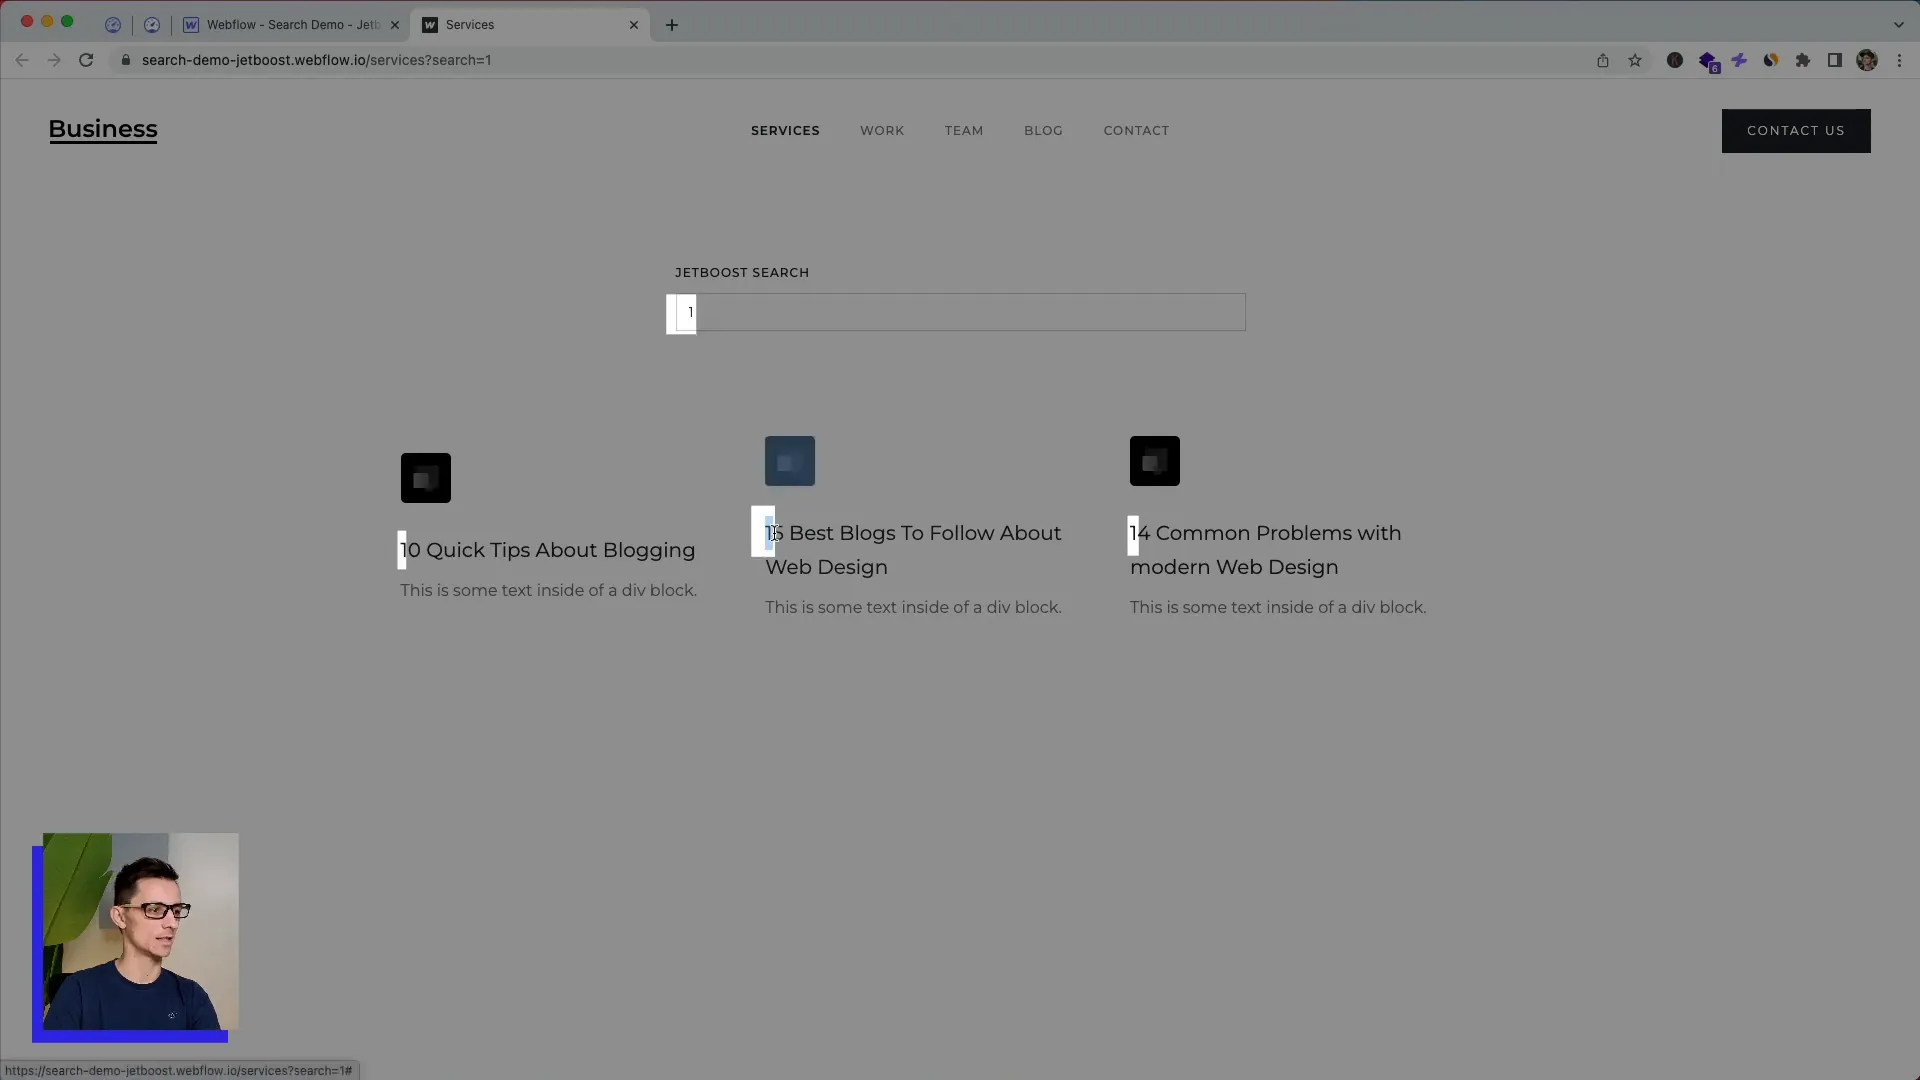
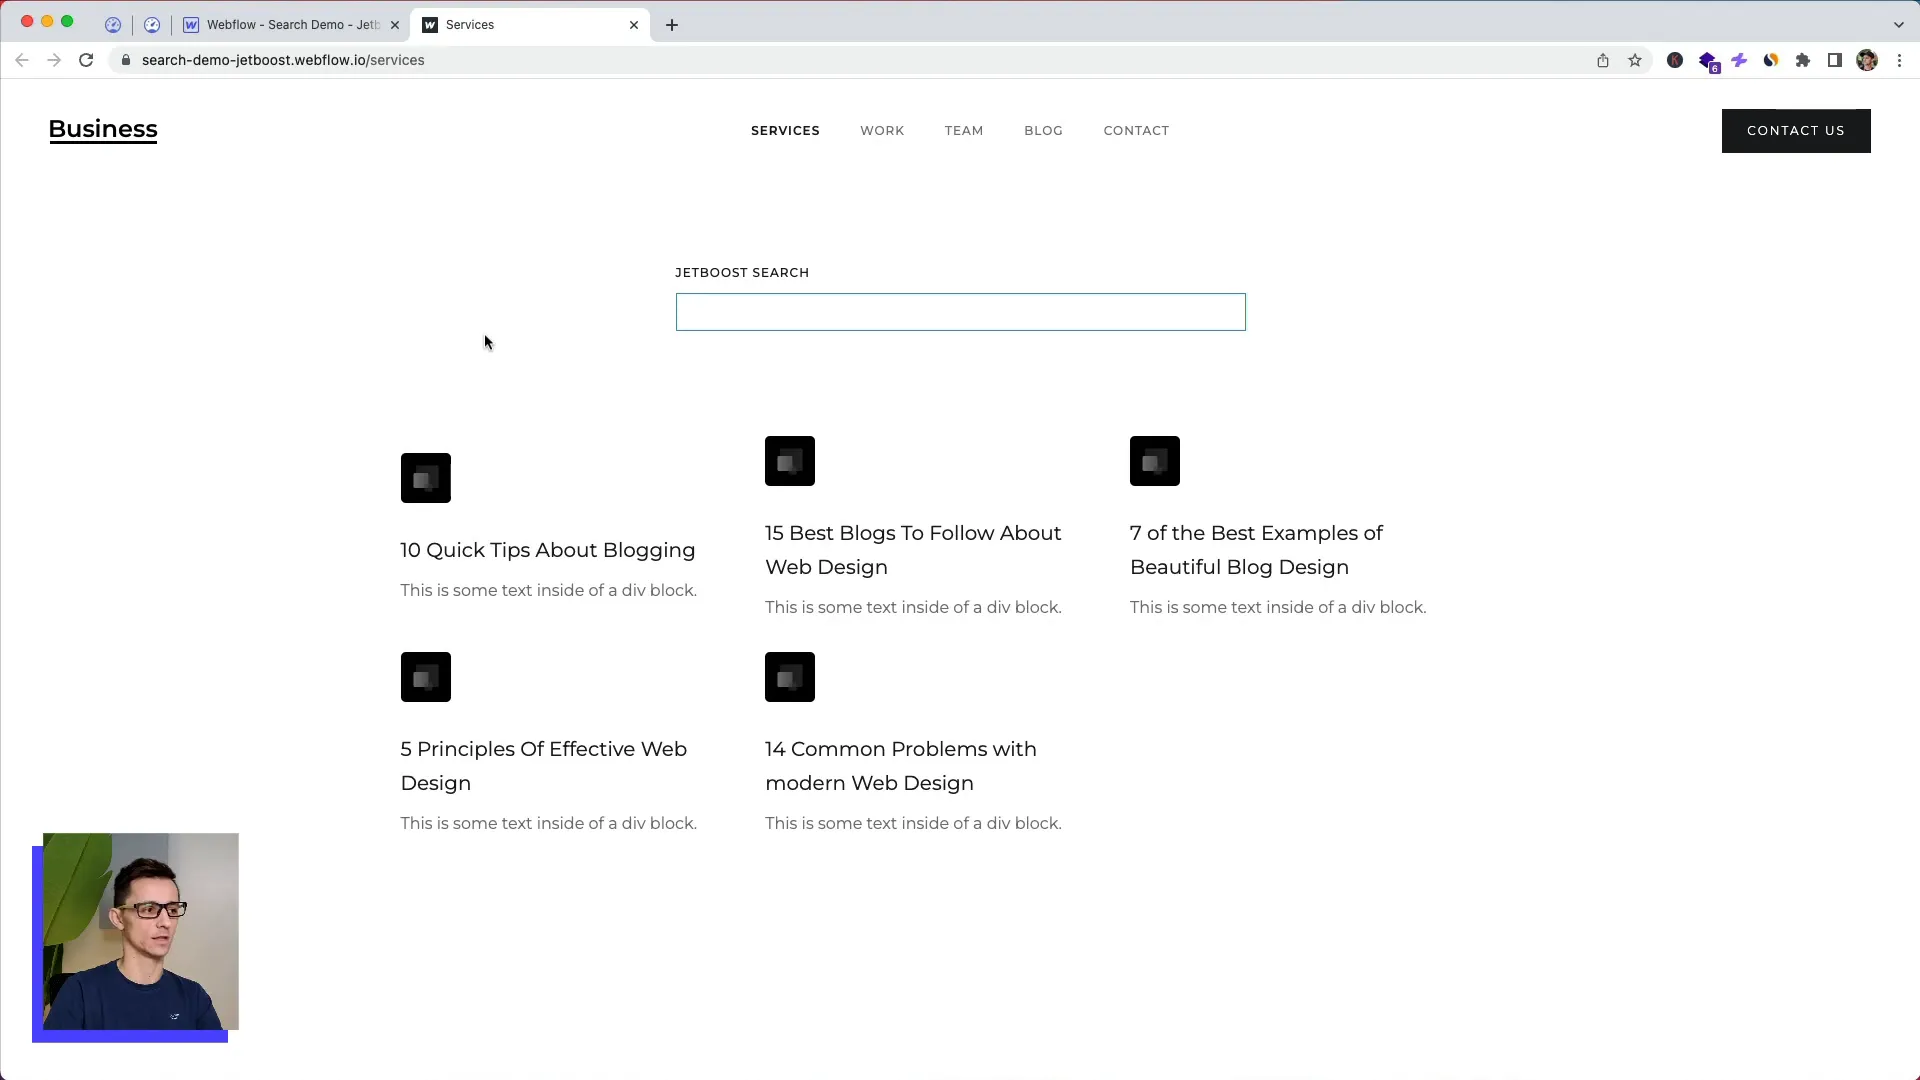
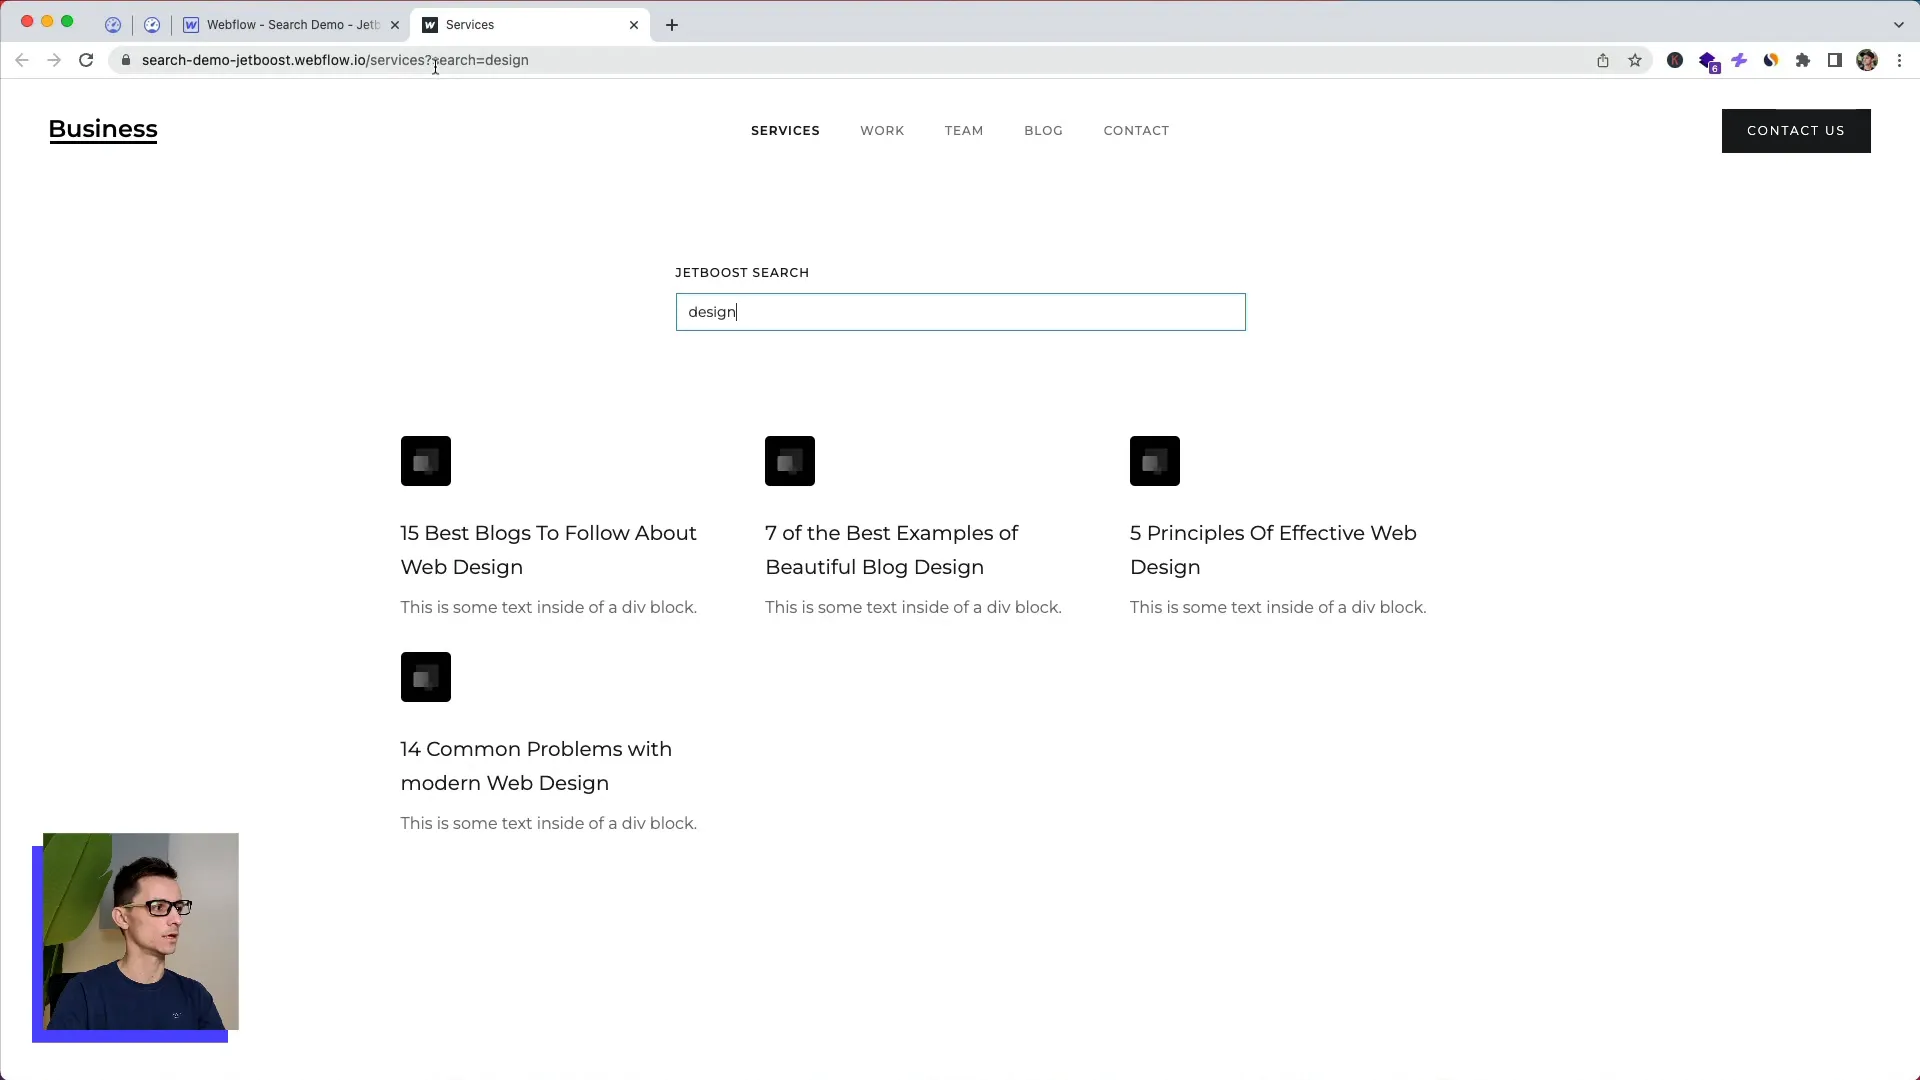
After publishing your site, you can test the search functionality on your live site. Try searching for terms like “10” or “design” and watch the results update in real time. If you delete the search term, the results should adjust accordingly, showcasing the flexibility of this live search feature.
Advanced Features and Power-ups
Jetboost offers several additional features, known as power-ups, that can enhance your search functionality. For instance, you can add a reset button that clears the search input and displays all results again. Additionally, you can customize messages for when no results are found, providing clearer feedback to users.
URL Updates with Search Queries
Another useful feature is the ability to update the URL with the search query. For example, if you search for “10,” the URL will reflect this as “?search=10.” This is particularly handy for sharing links with others, as it preserves the search state when the page is reloaded. If you prefer not to have this feature, you can disable it in the Jetboost settings.
Conclusion
Integrating a live search functionality into your Webflow site using Jetboost can significantly enhance user experience. It provides instant feedback and allows users to navigate through your content efficiently. With the additional features offered by Jetboost, you can further customize the search experience to meet your needs. If you’re ready to start using Jetboost, you can sign up here and follow the steps outlined in this guide to implement this powerful tool on your site.
For more tips and tricks on Webflow, don’t forget to subscribe for future content. Happy building!