Mar 5, 2025
Easy Steps to Integrate Google AdSense with Webflow
Integrating Google AdSense with your Webflow site is a straightforward process that can help you monetize your content effectively. In this guide, I’ll walk you through each step, ensuring that you have all the details you need to get started. Let’s dive in!
Getting Started with Google AdSense
The first thing you need to do is access your Google AdSense account. If you don't have one yet, you’ll need to create an account. Once you’re logged in, follow these steps:
- Navigate to the Ads section in your AdSense dashboard.
- Locate your website listed there.
- Click on the Get Code button to generate the code you need.
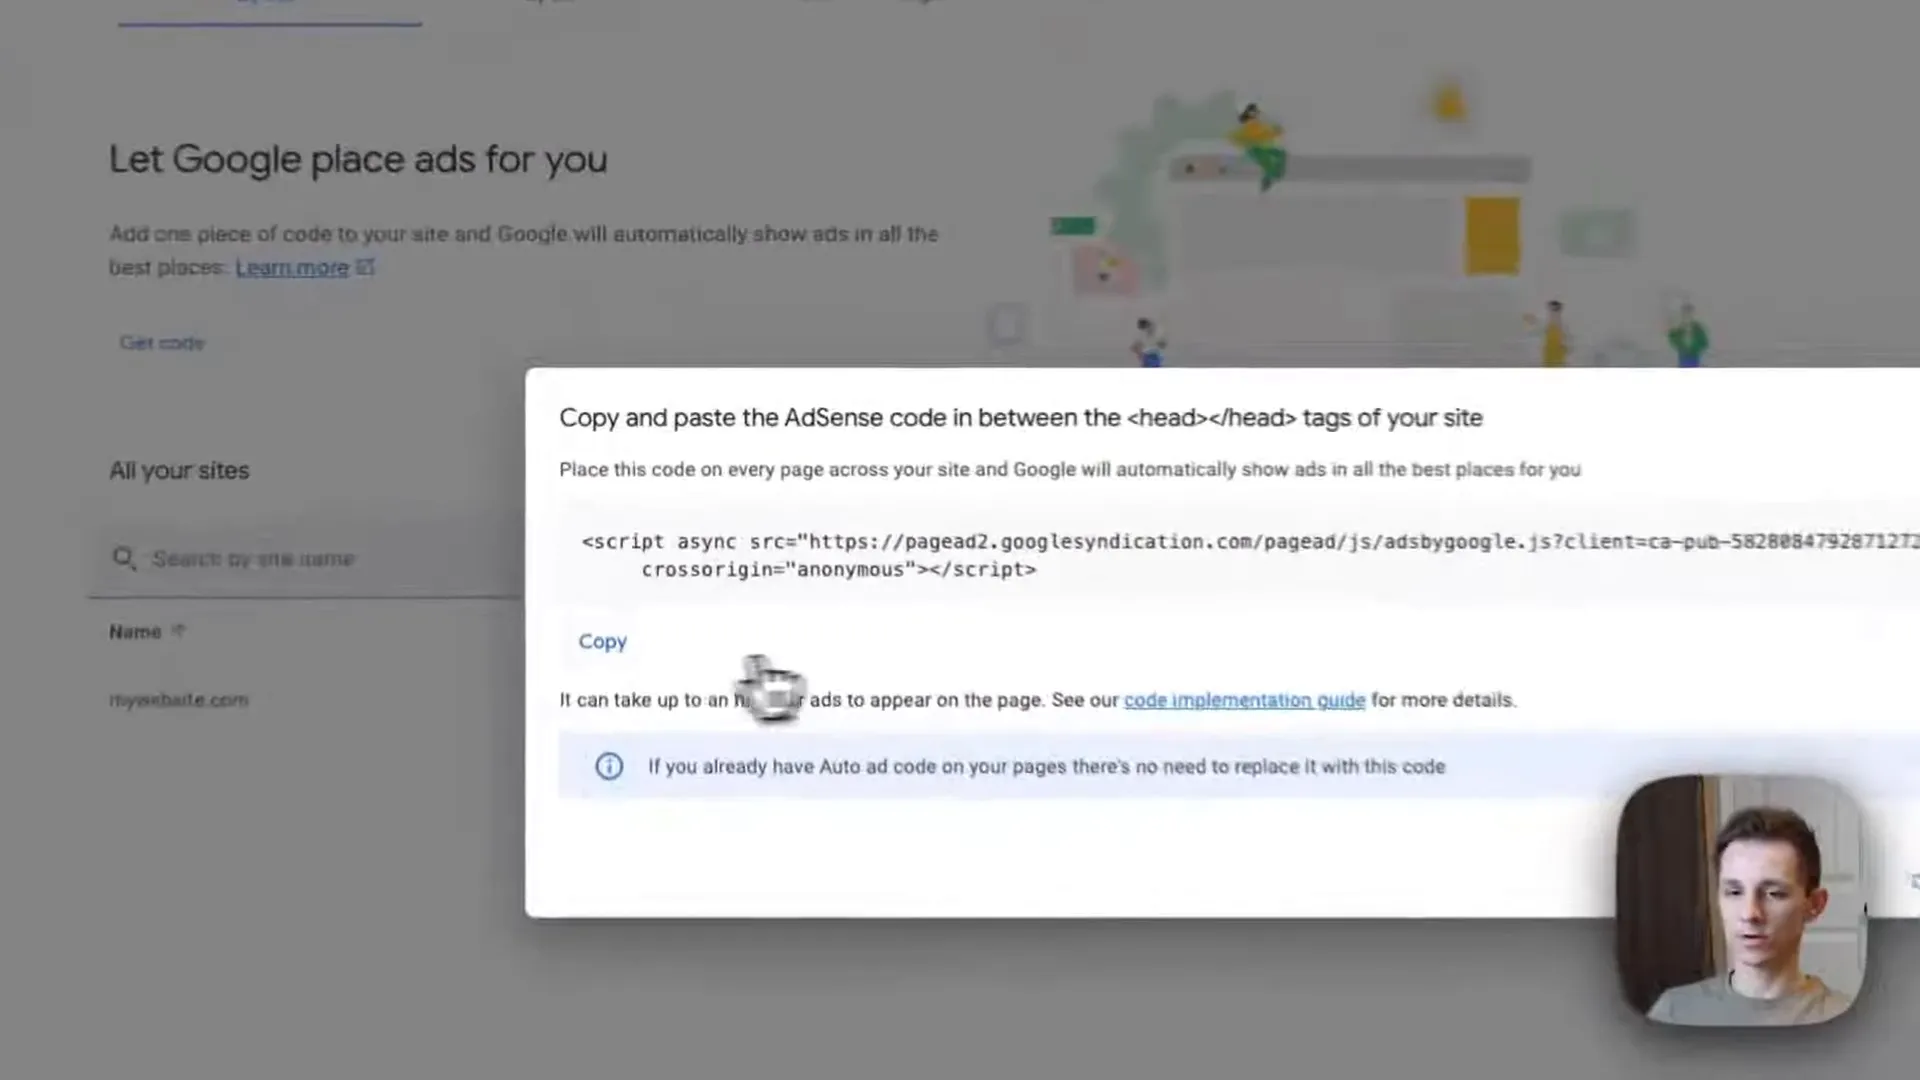
After clicking the button, you’ll see the code. Simply click the Copy button to copy it to your clipboard. This code is crucial as it will allow Google to display ads on your site.
Adding AdSense Code to Your Webflow Site
Now that you have the AdSense code, it’s time to integrate it into your Webflow project. Here’s how to do it:
- Open your Webflow dashboard.
- Navigate to Site Settings.
- Scroll down to the Custom Code section.
- Paste the AdSense code between the
<head>tags.
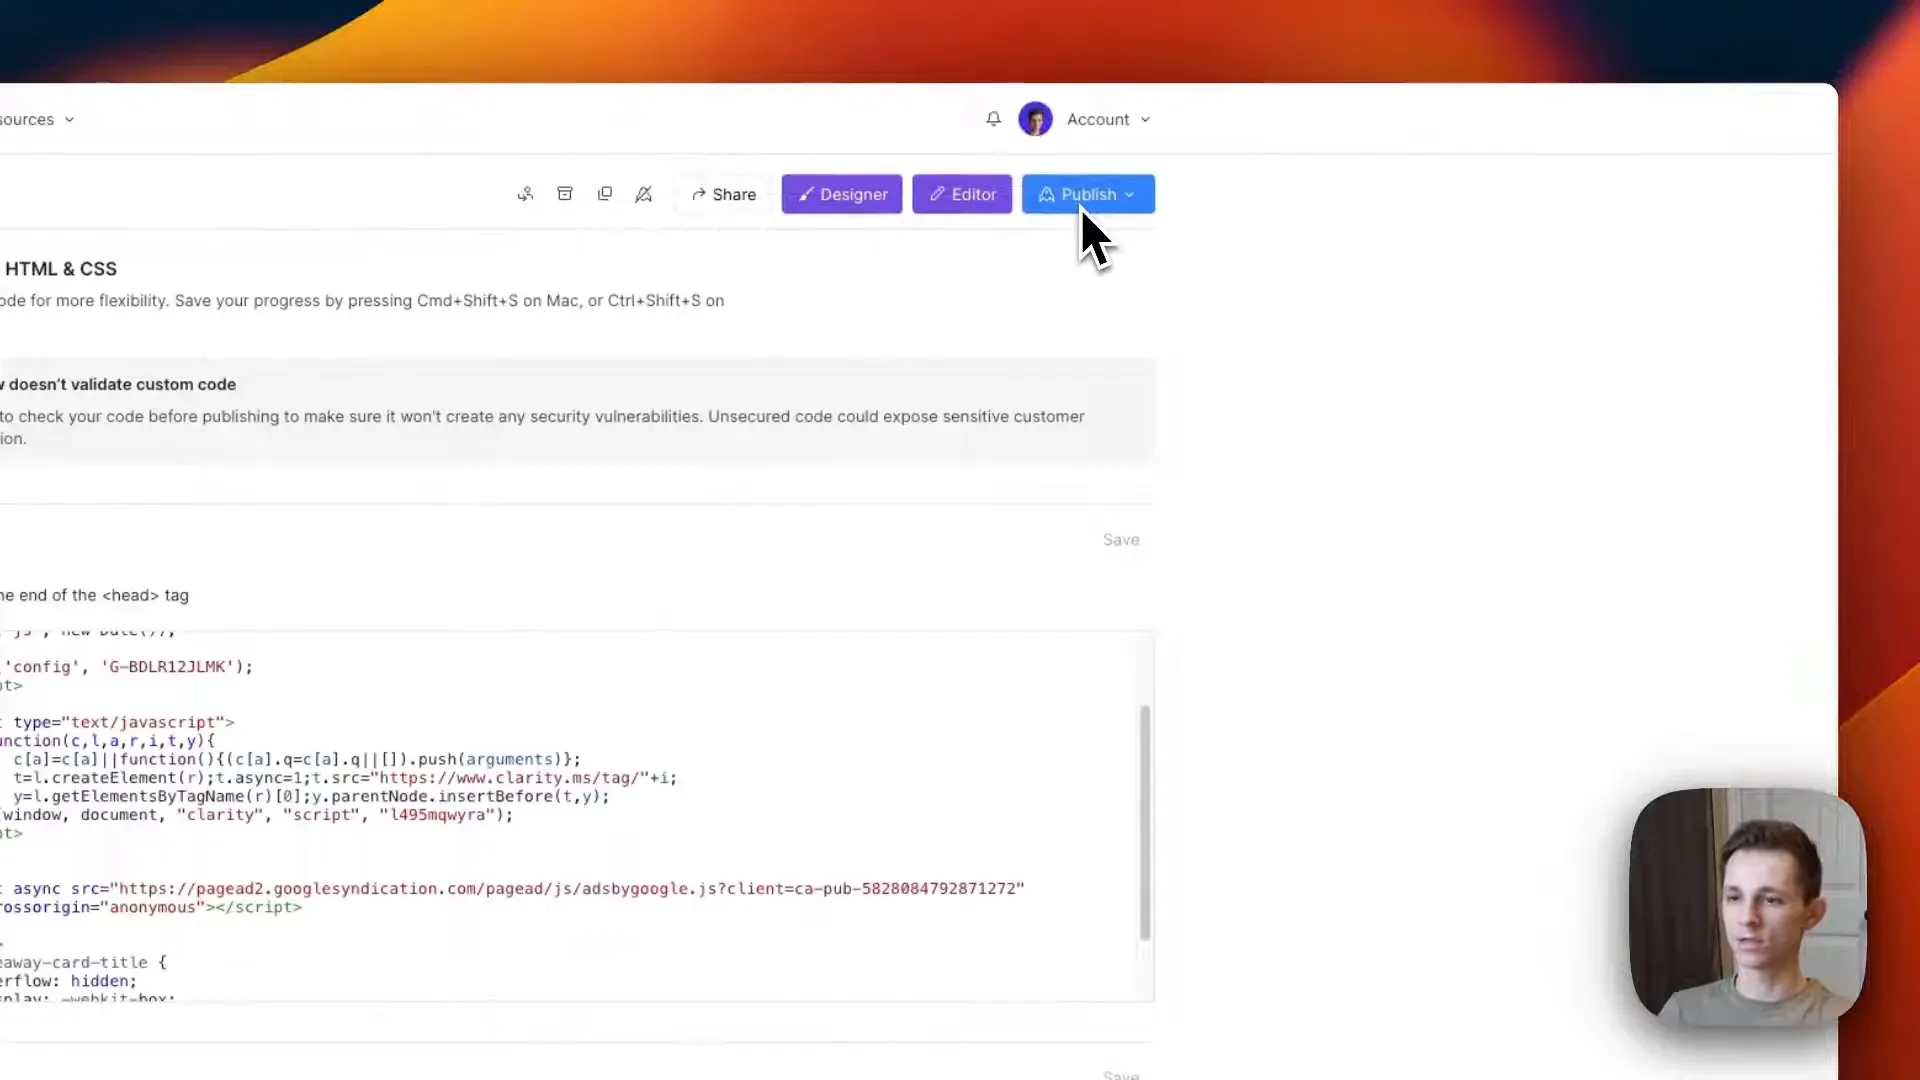
Make sure to click the Save button after pasting the code. This step is vital to ensure the changes are saved. Once you’ve saved the code, don’t forget to click the Publish button to push the changes live to your site.
Checking Your Ads
Once you have published your site, you can check if the ads are appearing correctly. Here’s what to do:
- Visit your website and inspect the layout.
- Look for ads on the left and right sides of your page. If you see them, congratulations—you’ve successfully integrated AdSense!
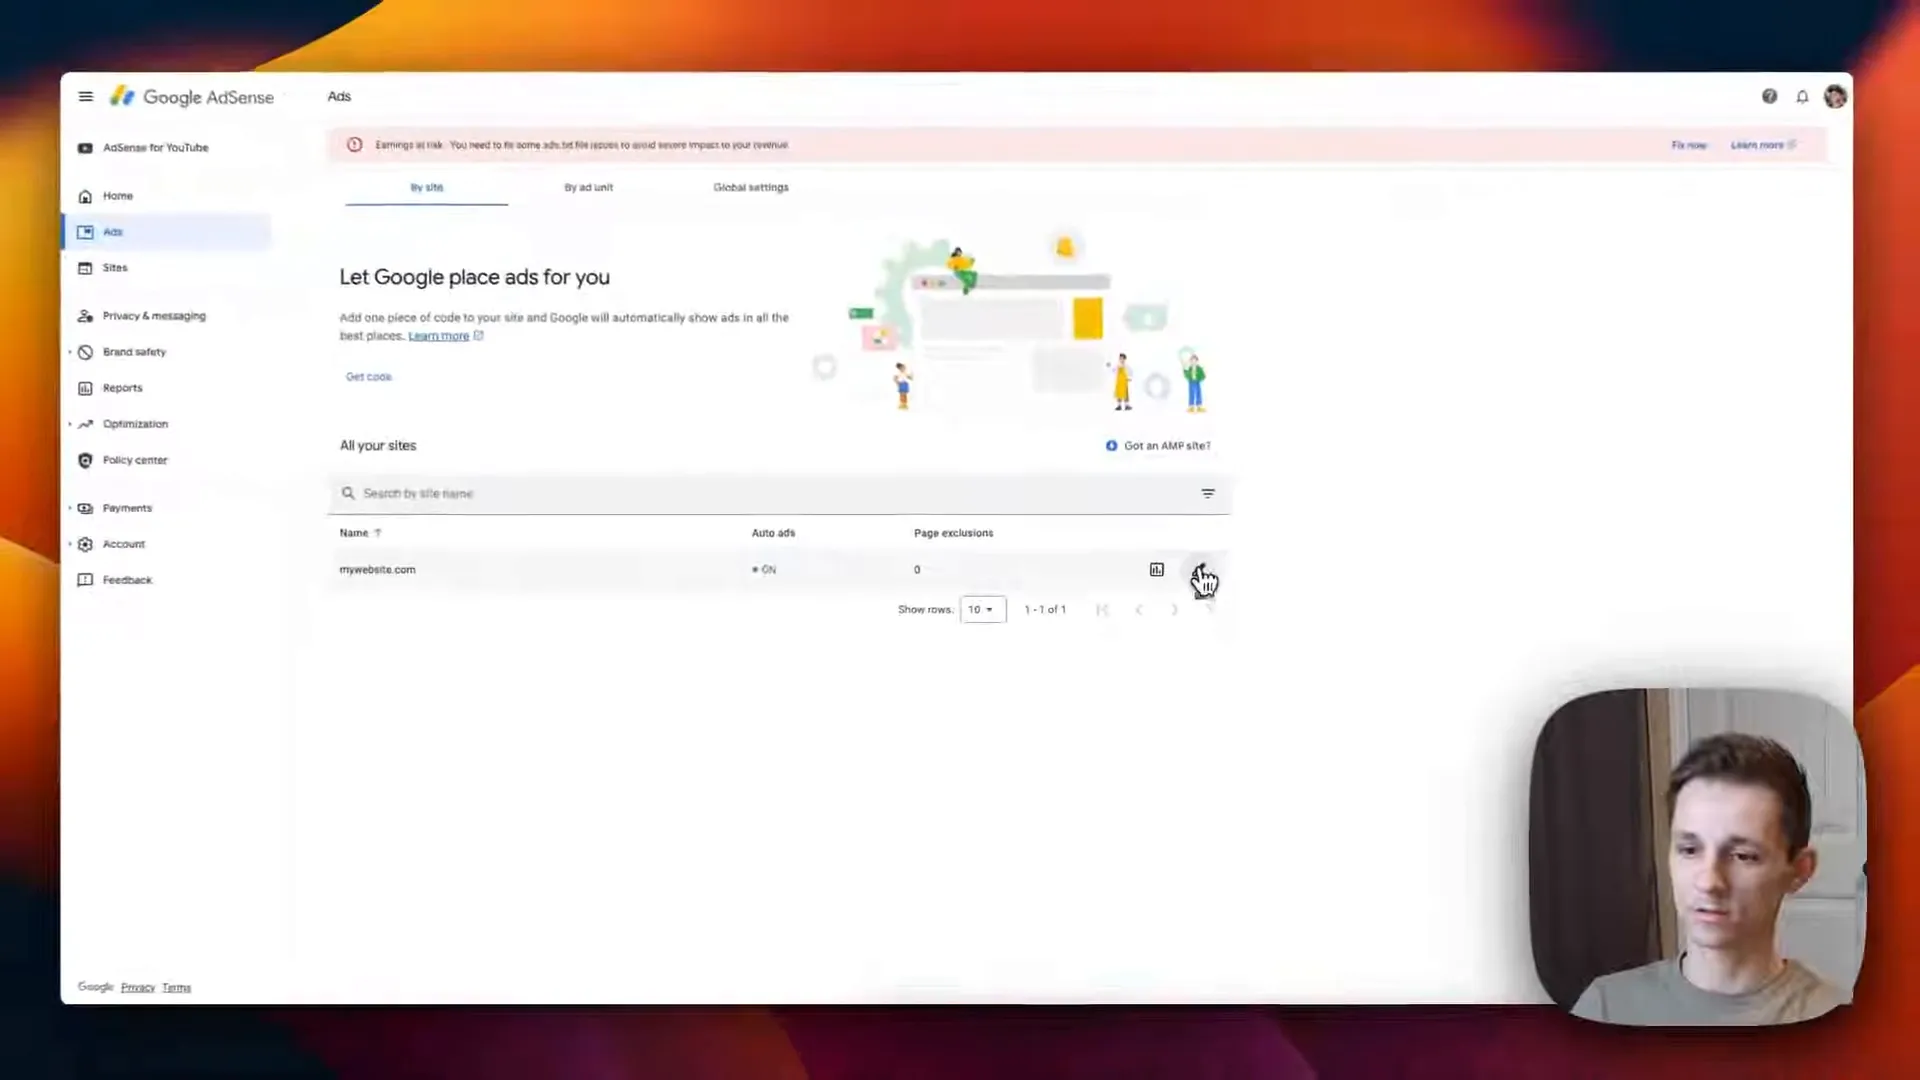
In this example, I’m using the Auto Ads feature in Google AdSense. This feature automatically places ads on your website, making it easier to manage your ad placements.
Customizing Your Ad Settings
If you want to tweak how these ads look or where they appear on your site, you can do so easily. Here’s how:
- Go back to your AdSense dashboard and click the Edit button.
- Look for the Auto Ads section.
- You’ll find options for overlay ads and sticky anchors. I personally find popup ads intrusive, but you can enable them if you prefer.
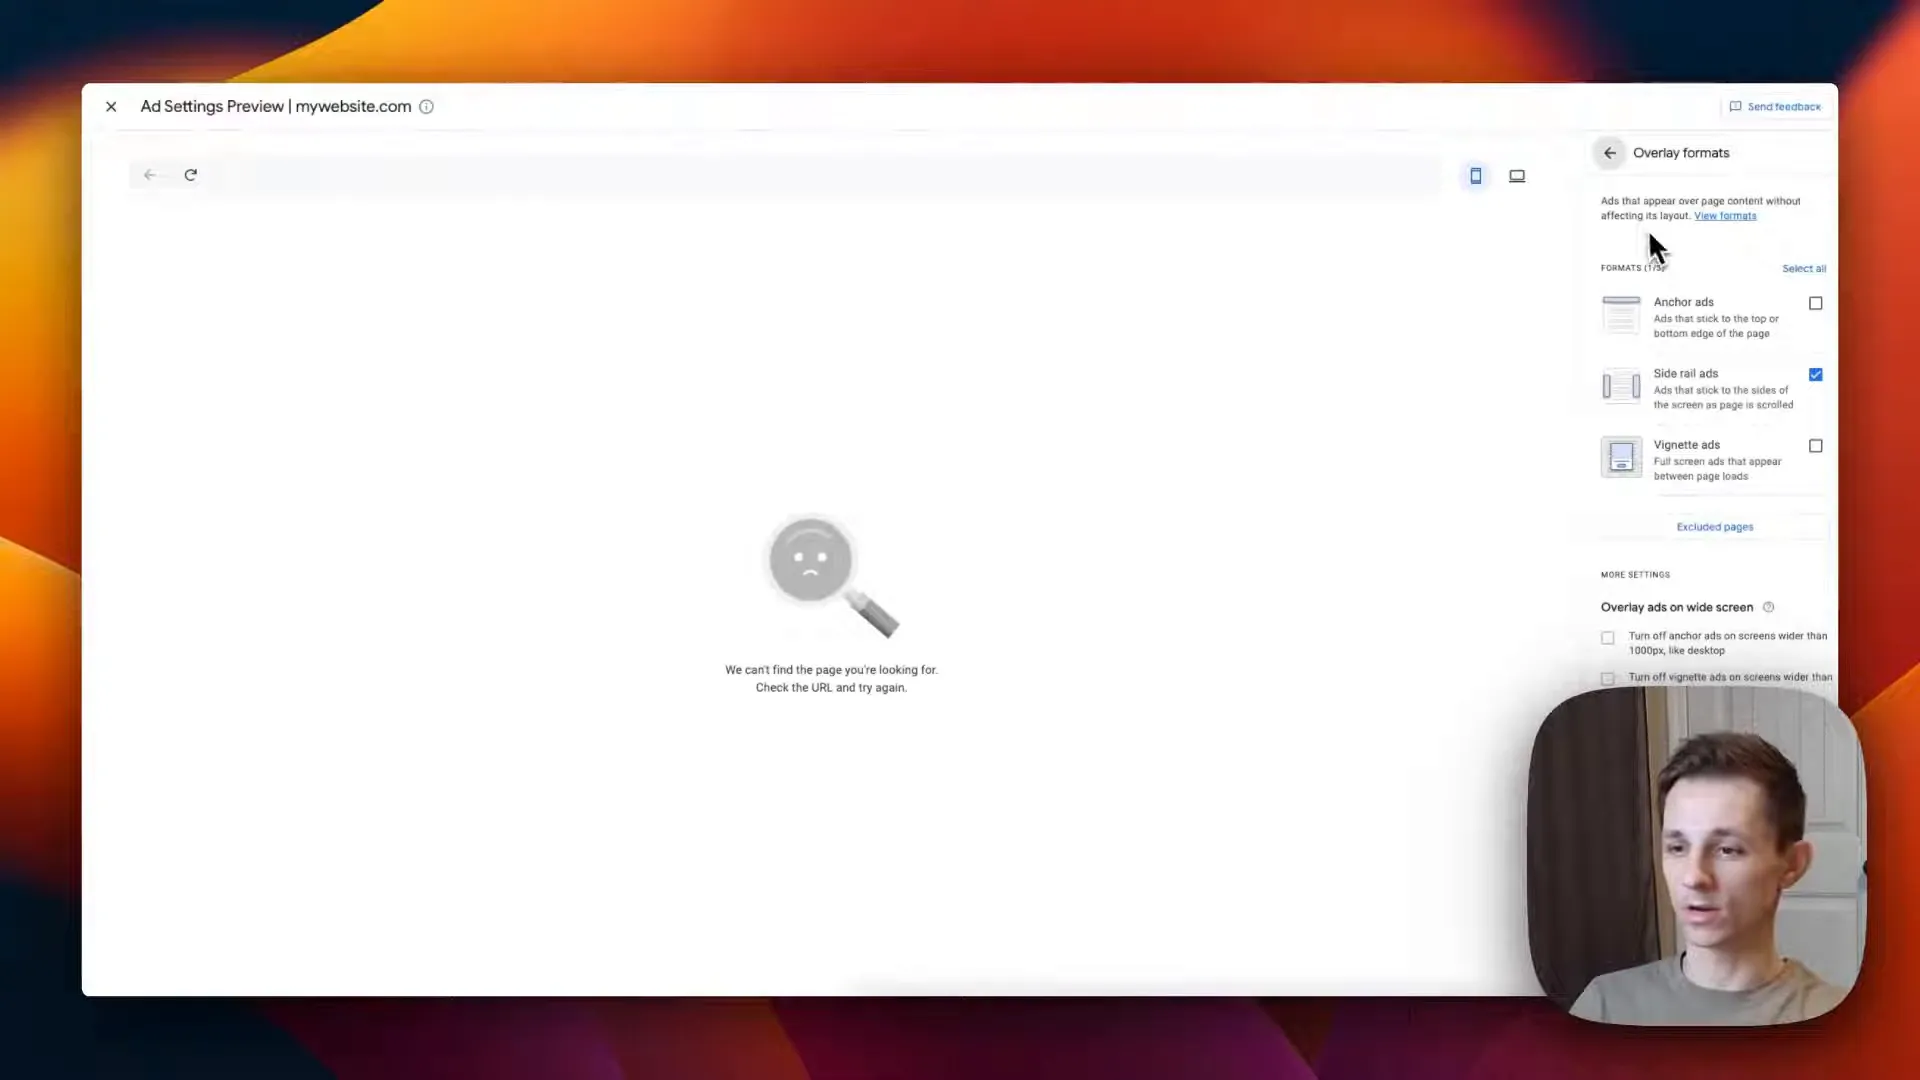
To enable or disable any specific ad type, simply check or uncheck the respective boxes and click Apply to Site.
Manual Ad Placement for More Control
If you prefer to have full control over where your ads show up, you can opt for manual placements instead of Auto Ads. Here’s how:
- In your AdSense dashboard, navigate to the Ad Unit tab.
- Create a new ad unit by selecting the type of ad you want (e.g., display ads, text ads).
- Customize the size and layout according to your preferences.
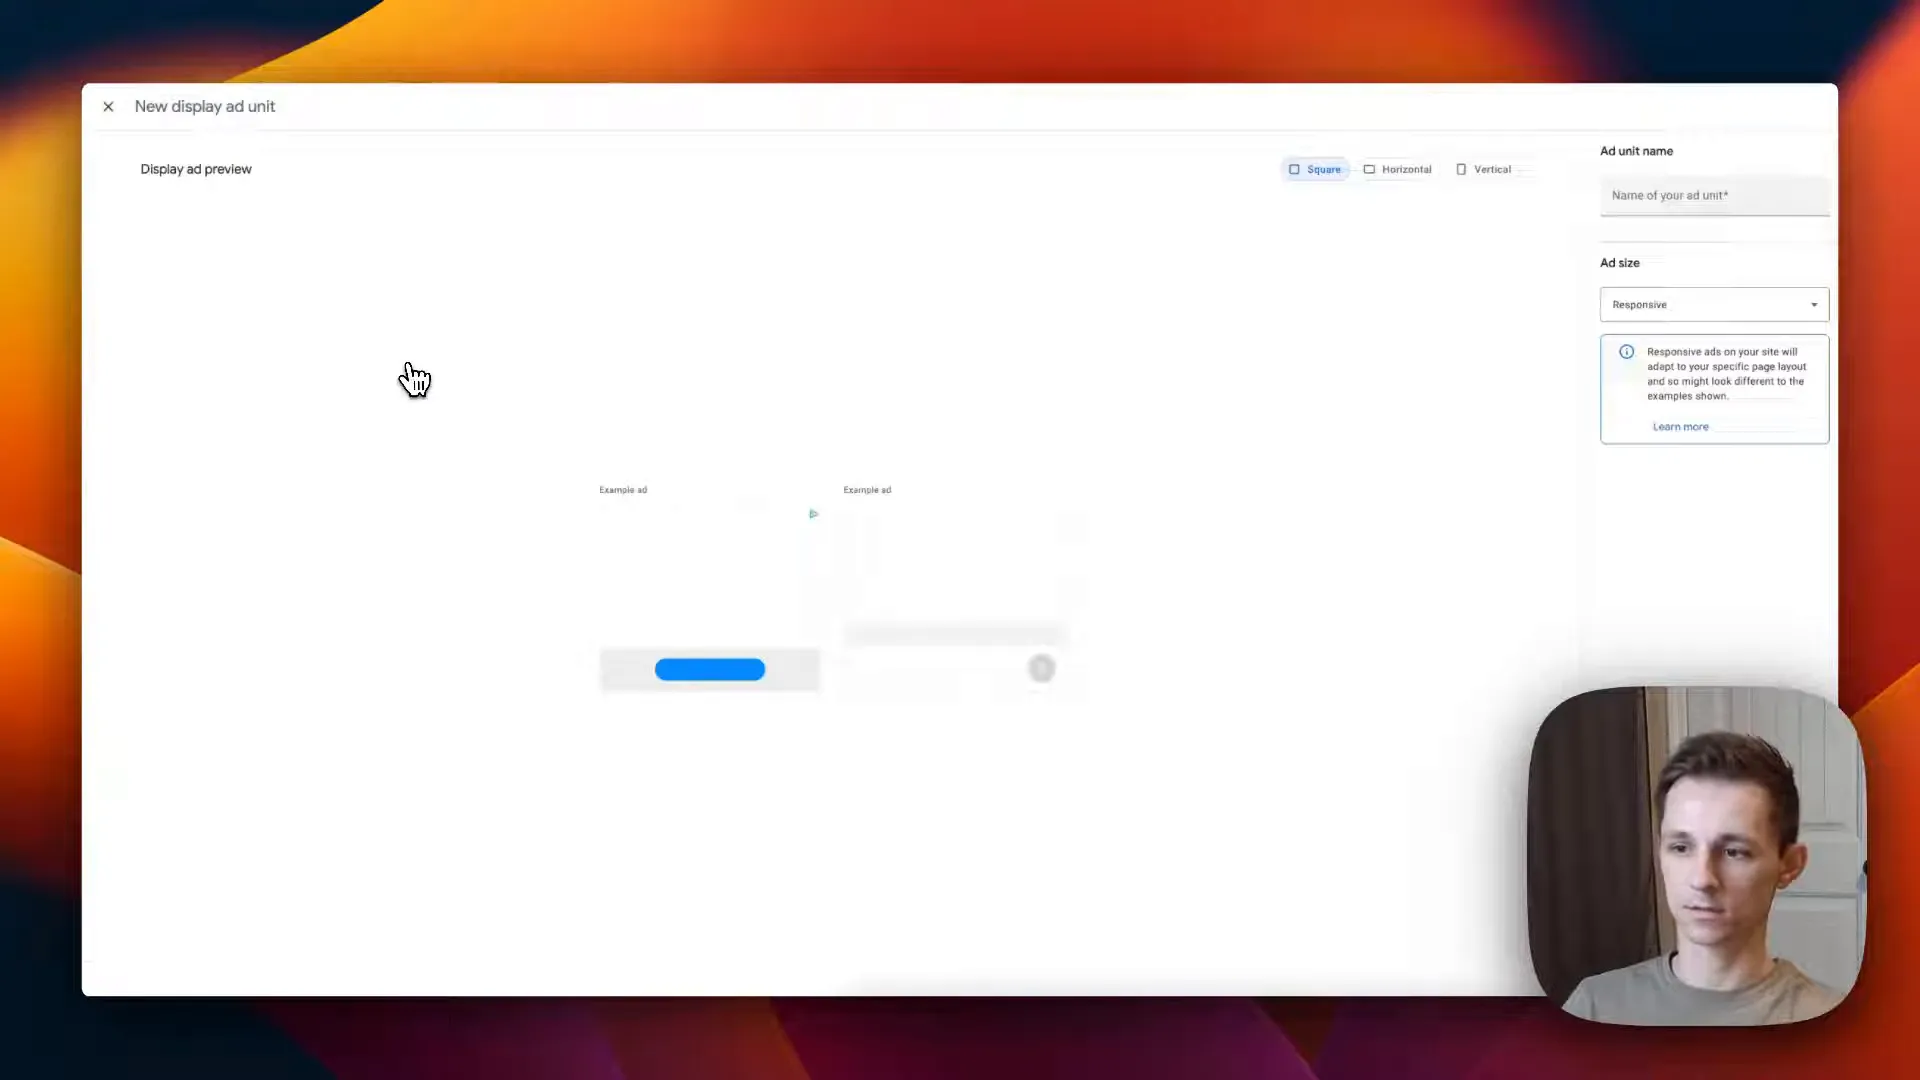
Once you’ve created your ad unit, click on the Get Code button. This will generate a new code for your custom ad units.
Embedding Your Ads in Webflow
Now that you have your custom ad code, it’s time to embed it into your Webflow site:
- Open your Webflow project and drag an Embed element to the section where you want the ad to appear.
- Paste the ad code into the Embed element.
- Click Save and then Publish your site again.
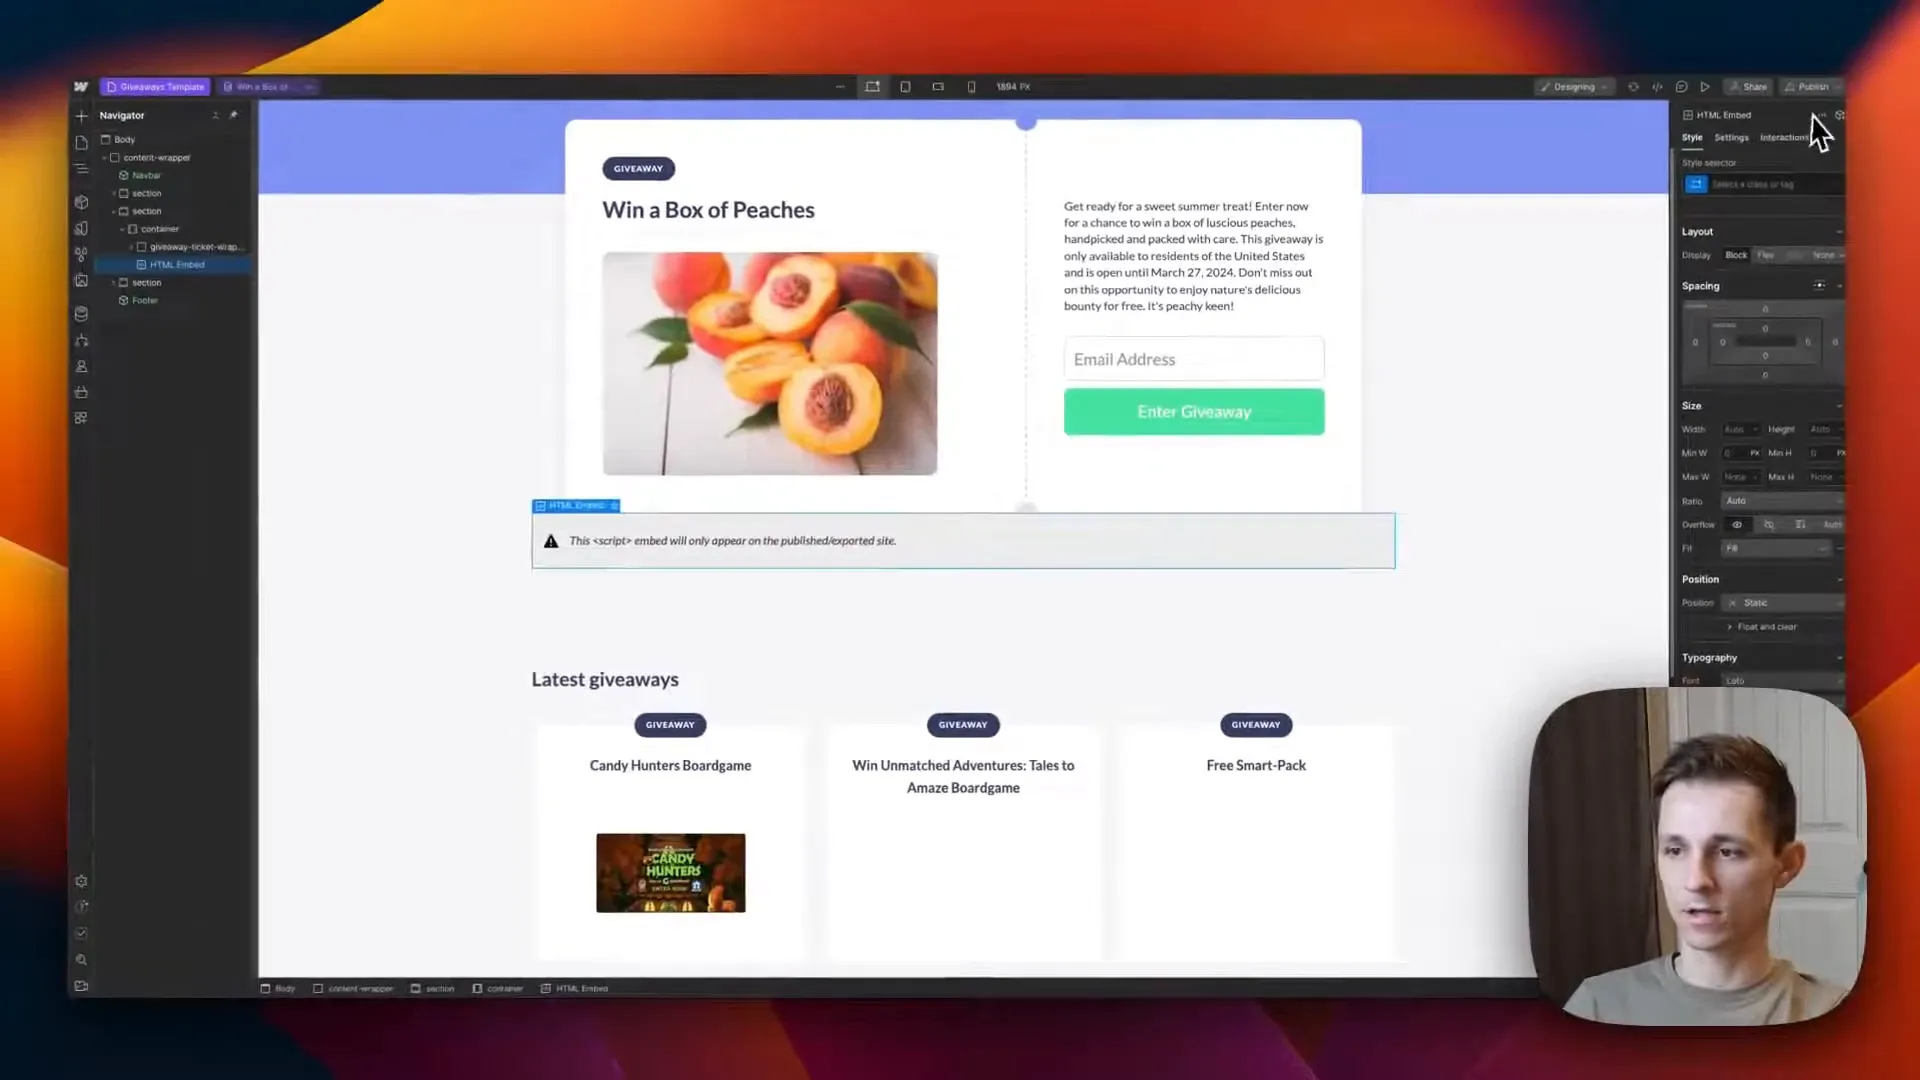
Once published, you should start seeing the ads appear in the designated areas of your site.
Making Ads Responsive
To ensure that your ads look good on all devices, you might want to make them responsive. If you wish to hide ads on smaller screens, follow these steps:
- Navigate to the smaller screen size view in your Webflow designer.
- Click on the ad element and select Hide or set it to Display None.
This way, you can maintain a clean and user-friendly layout, ensuring that ads do not interfere with the mobile experience.
Final Thoughts
Integrating Google AdSense with your Webflow site is a simple yet powerful way to monetize your content. Whether you choose to use Auto Ads for convenience or manually place ads for better control, the process is straightforward. Just remember to balance your ad placements with user experience to keep your audience engaged.
If you need further assistance with your Webflow projects, feel free to reach out via email. Happy monetizing!
Thanks for reading, and I hope to see you in the next tutorial!