How to Set Expiration Dates for Pages or Posts in WordPress
Managing content on your WordPress site can be a breeze, especially when you have the right tools at your disposal. One such tool is the ability to set expiration dates for your posts and pages. This feature comes in handy for time-sensitive content, such as promotions or seasonal articles. In this guide, I’ll show you how to easily set expiration dates for your WordPress content using a simple plugin. Let's dive in!
Why You Need Expiration Dates for Your Content
Have you ever encountered outdated promotions, irrelevant articles, or seasonal posts that linger on a website long after their relevance has passed? Expiring content can keep your site looking fresh and organized. Here are a few reasons why you might want to implement expiration dates:
- Promotional Content: Time-sensitive offers or discounts should disappear once they are no longer valid to avoid confusing your visitors.
- Seasonal Articles: Posts related to specific events or seasons can quickly become irrelevant. Expiring these posts keeps your content library clean.
- Temporary Announcements: Announcements regarding events or contests should only be visible for a limited time.
Getting Started with Post Expiration Dates
To set expiration dates, we'll use a plugin called Post Expirator. This plugin is user-friendly, reliable, and works seamlessly with various types of WordPress content. Here’s how to get started:
Step 1: Install the Post Expirator Plugin
First, head over to your WordPress dashboard:
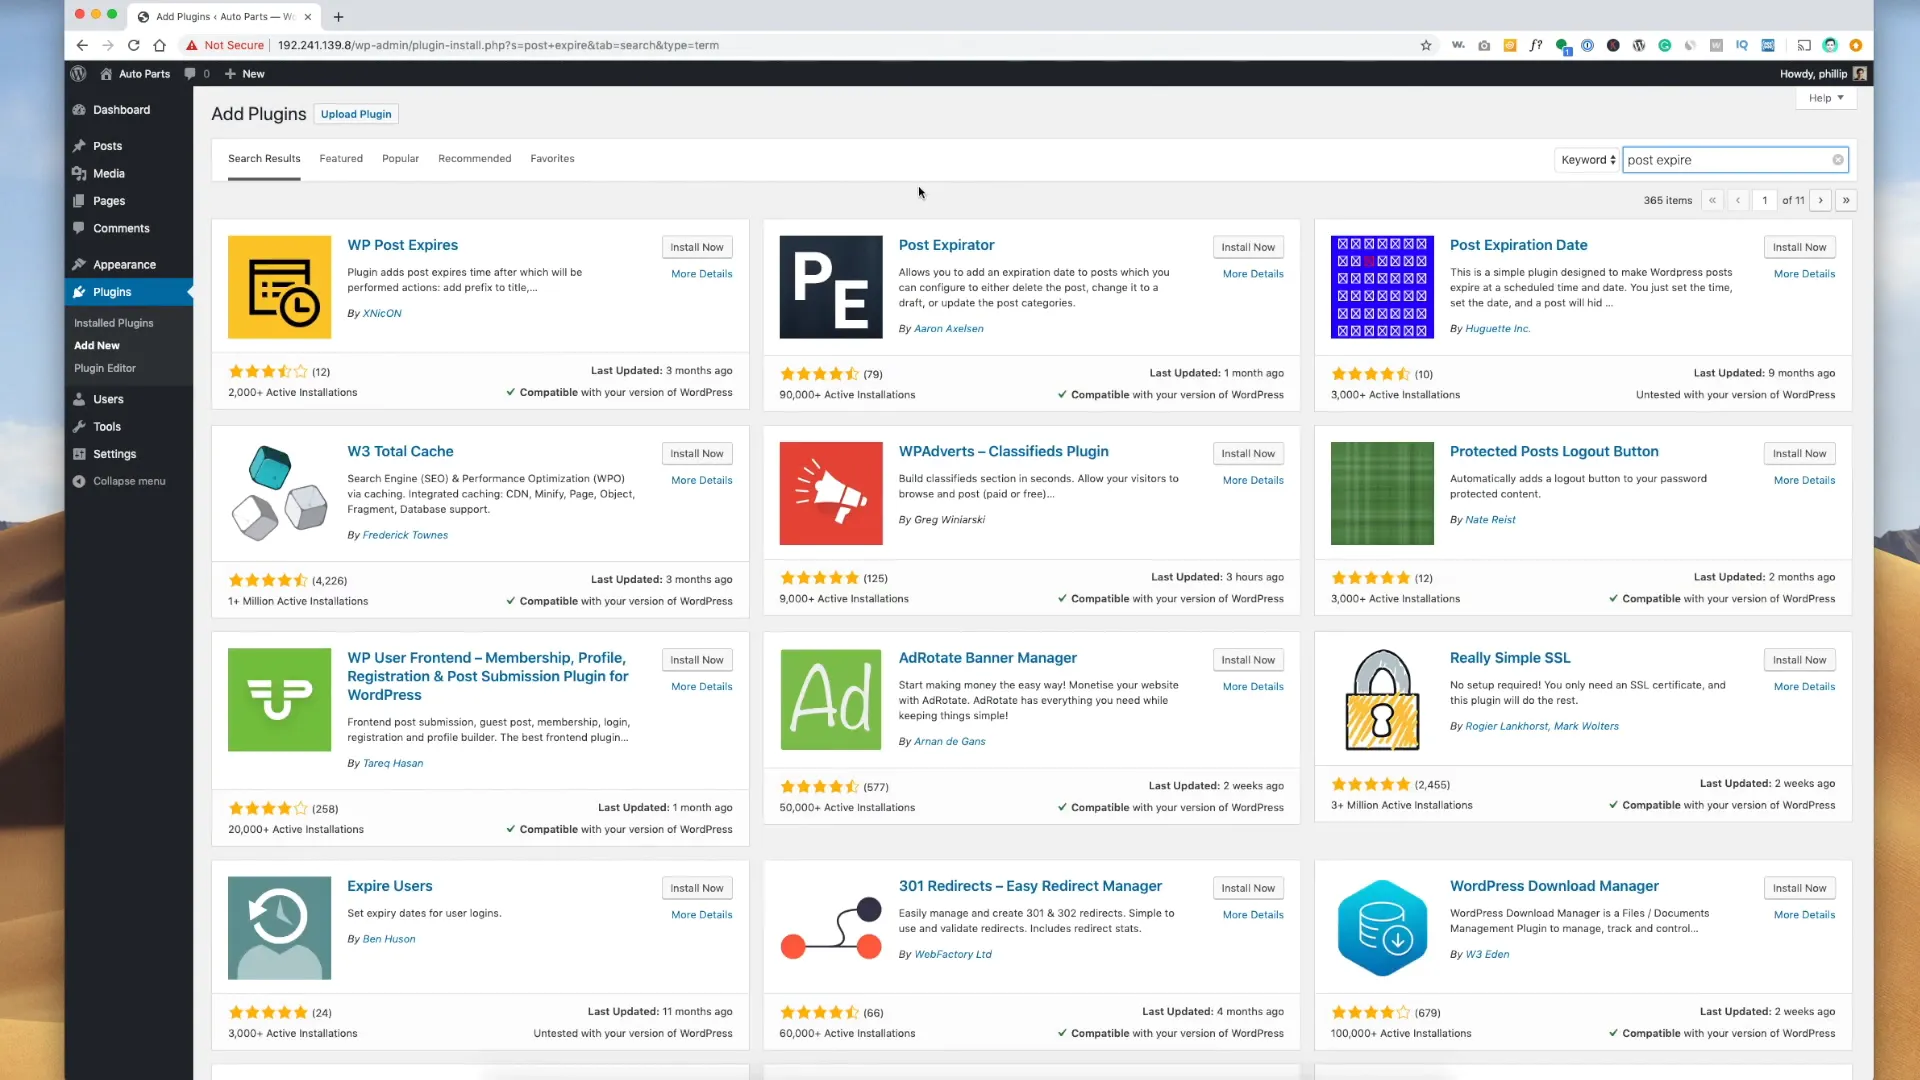
- Navigate to Plugins > Add New.
- In the search bar, type Post Expirator.
- Find the plugin with the PE logo and click Install Now. Once installed, click Activate.

Step 2: Configure the Plugin Settings
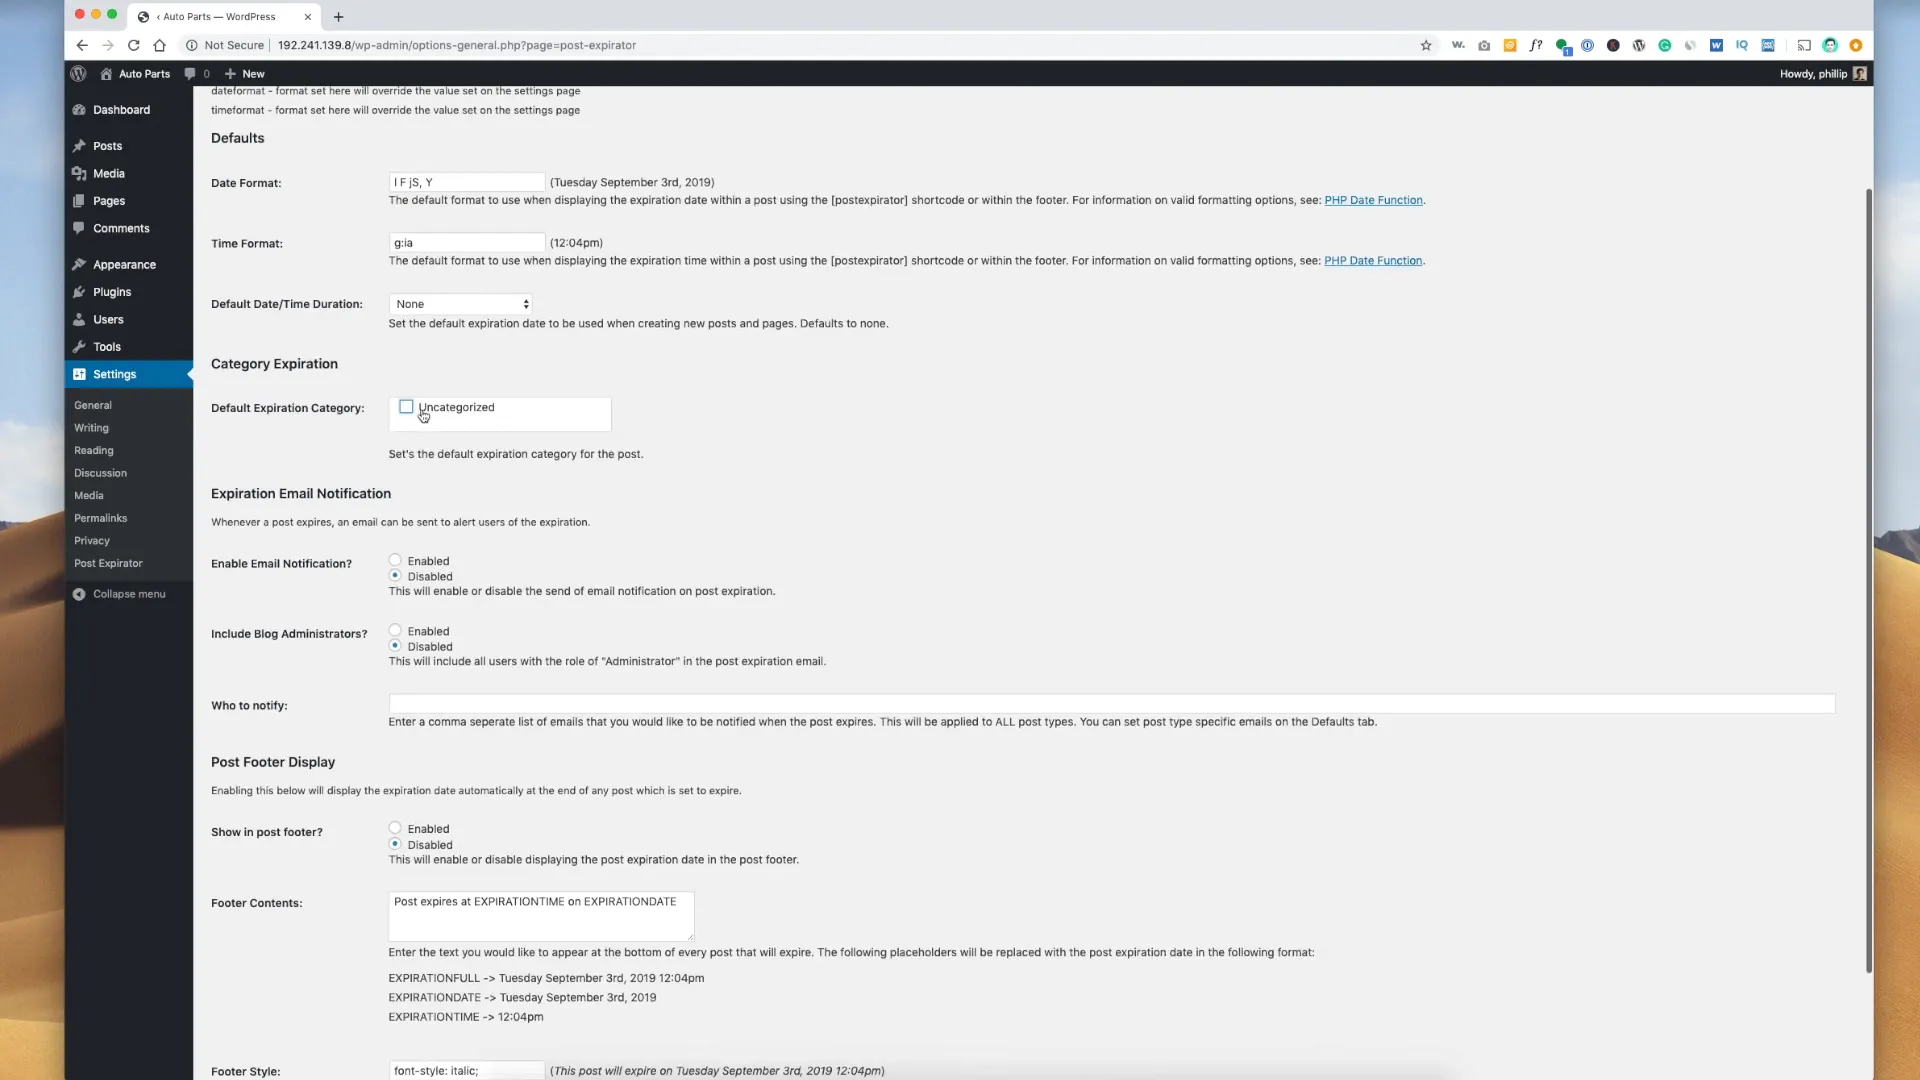
Once the plugin is activated, it’s time to set it up. Go to Settings > Post Expirator. Here, you can configure several important settings:
- Date Format: Choose how you want dates to be displayed.
- Time Format: Set your preferred time format.
- Default Category for Expired Posts: If you want expired posts to be categorized differently, you can set a default category here.
- Email Notifications: Enable notifications to be sent when a post expires, ensuring you stay informed about your content.

Step 3: Enable Expiration for Your Posts
Now comes the exciting part—setting expiration dates for your posts! Here’s how to do it:
- Go to your Posts section and click on Edit for the post you want to expire.
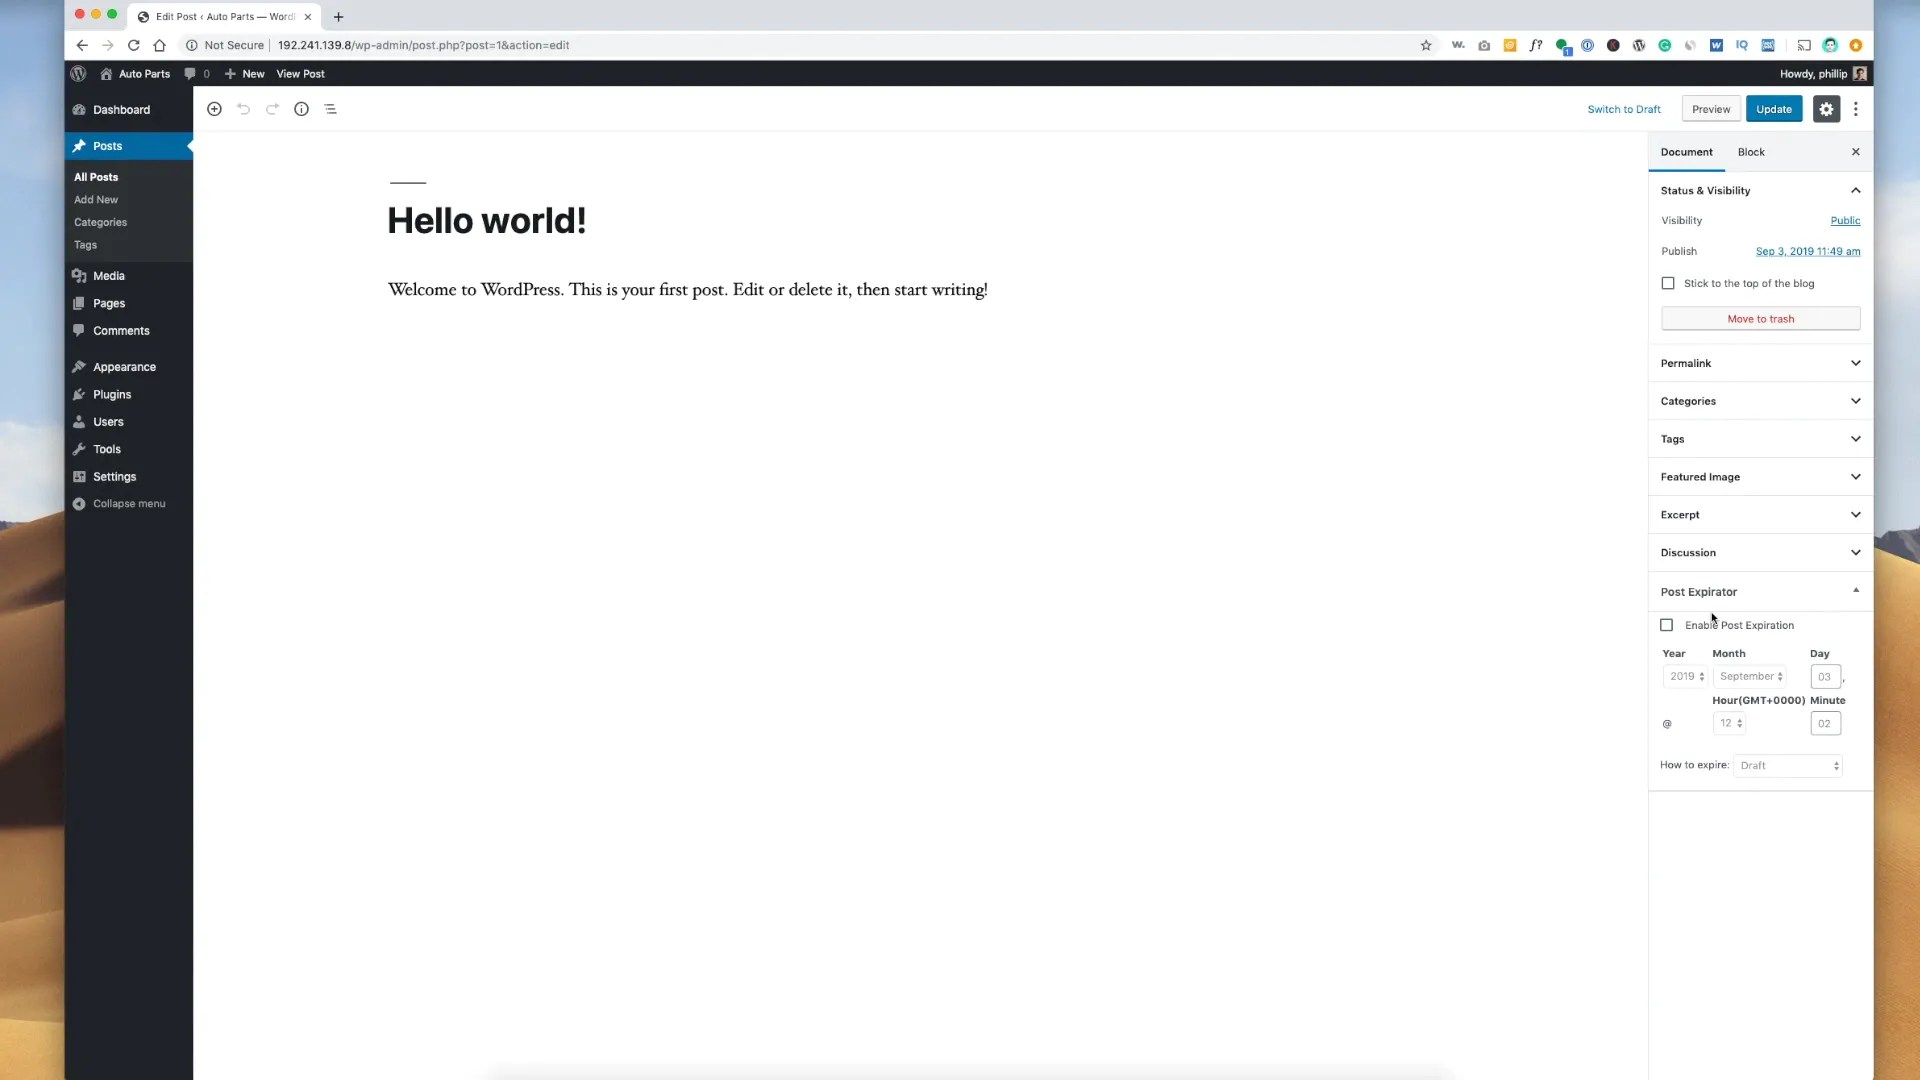
- Scroll down to find the Post Expirator section on the bottom right of the editor.
- Check the box to Enable Post Expiration.
- Set the expiration date and time. For example, if you want the post to expire on December 30th, select that date.
- Choose what happens when the post expires. Options include:
- Delete: Permanently remove the post.
- Trash: Move it to the trash where it can be restored later.
- Private: Make it accessible only to authorized users.
- Draft: Save it as an unpublished post.
- Change Category: Move it to a different category.

Managing Expired Content
Once your posts have expired, you might want to manage them effectively. You can sort your posts by their expiration status, making it easy to see which ones are due to expire soon or have already expired. This feature can be particularly useful if you have numerous posts on your site.
What Happens After Expiration?
After a post expires, it will automatically transition to the status you selected (deleted, private, draft, etc.). If you’ve enabled email notifications, you will receive alerts about expired content, allowing you to take action if necessary. This ensures that you’re always in control of your content library.
Conclusion
Setting expiration dates for posts and pages in WordPress is a straightforward process that can significantly enhance your website's content management. With the Post Expirator plugin, you can automate the removal of outdated content, keeping your site fresh and relevant. Remember, regularly reviewing your content and setting expiration dates can save you time and improve user experience on your site.
Have you tried setting expiration dates on your WordPress posts? What challenges have you faced? Feel free to share your experiences in the comments below!